How To
Now you should be able to head to http://<hostname>:8084/ to interact with the tool.
Create Domain

Begin by adding a domain on the Domains page (initial page), shown in the figure above, by clicking on the Add Domain button. Domain maintains context of domain discovery.
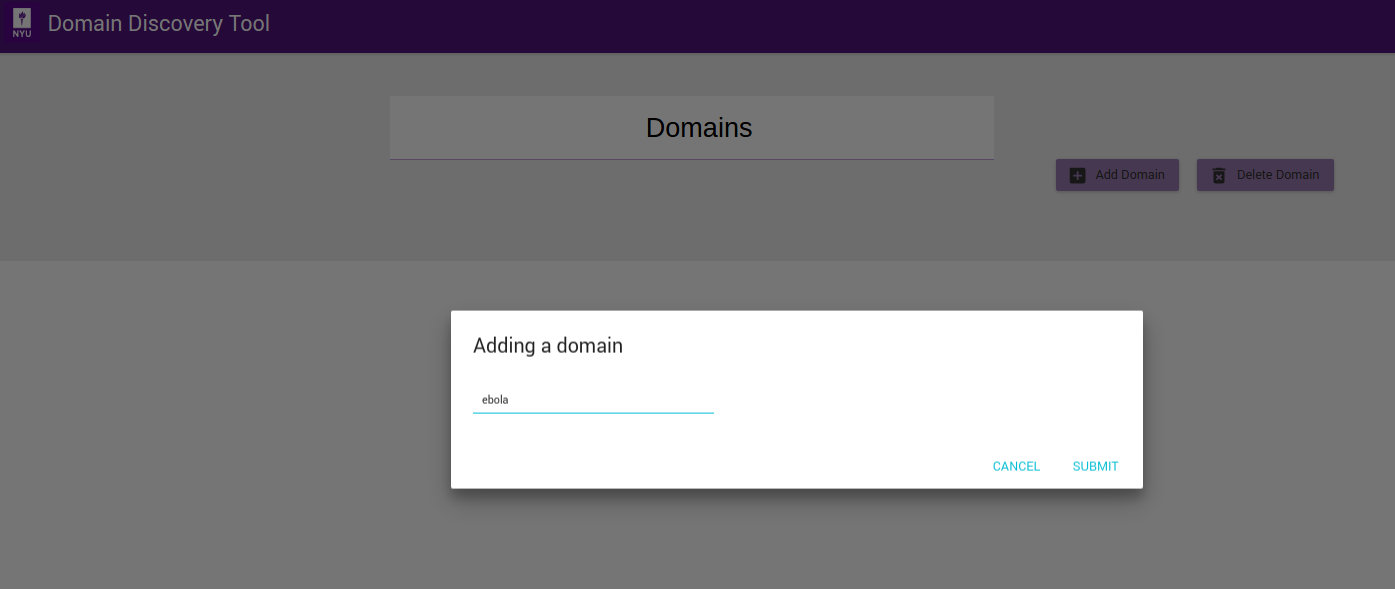
On the Adding a domain dialog shown in figure above, enter the name of the domain you would like to create, for example Ebola, and click on Submit button. You should now see the new domain you added in the list of domains as shown below.

Once domain is added click on domain name in the list of domains to collect, analyse and annotate web pages.
Delete Domain
Domains can be deleted by clicking on the Delete Domain button.
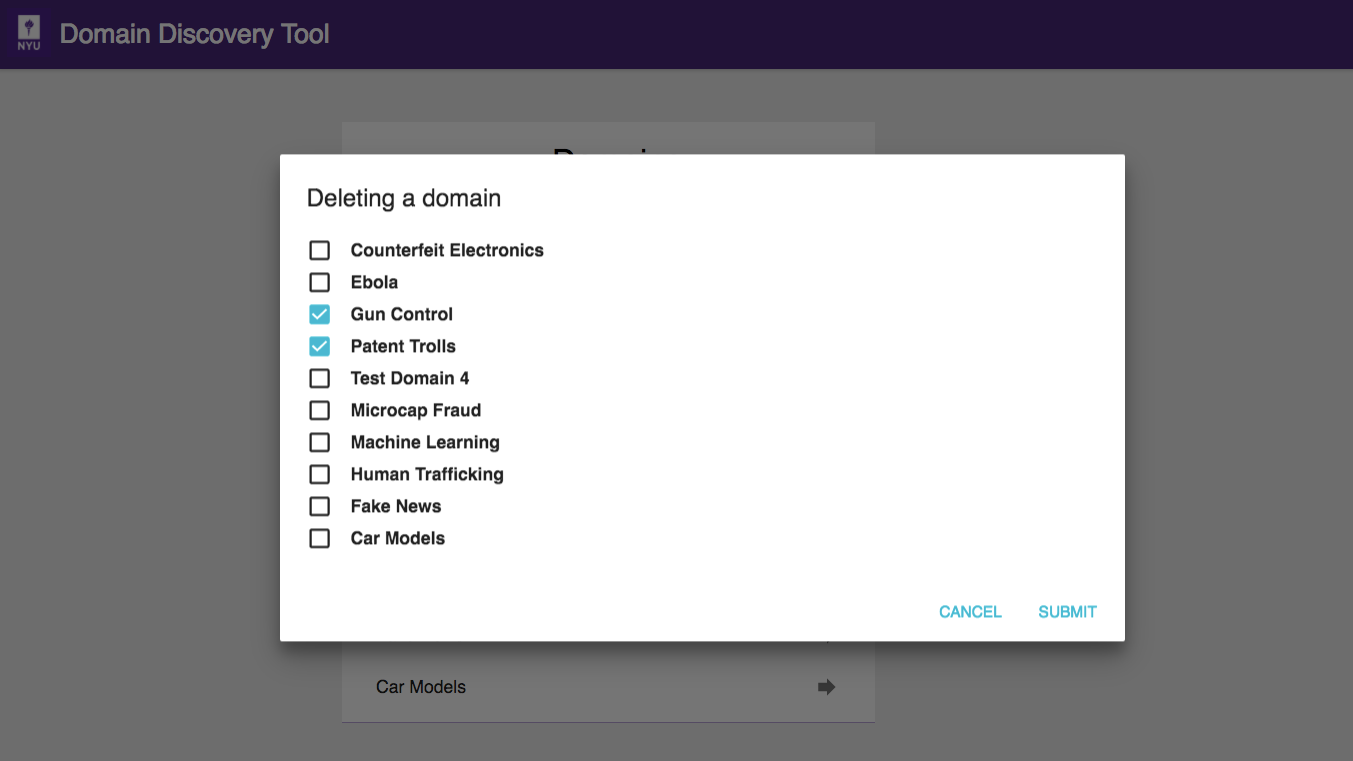
On the Deleting a domain dialog select the domains to be deleted in the list of current domains and click on Submit button. They will no longer appear on the domains list.
NOTE: This will delete all the data collected for that domain.
Acquire Data
Continuing with our example of the Ebola domain, we show here the methods of uploading data. Expand the Search tab on the left panel. You can add data to the domain in the following ways:
Upload URLs
If you have a set of URLs of sites you already know, you can add them from the LOAD tab. You can upload the list of URLs in the text box, one fully qualified URL per line, as shown in figure below:
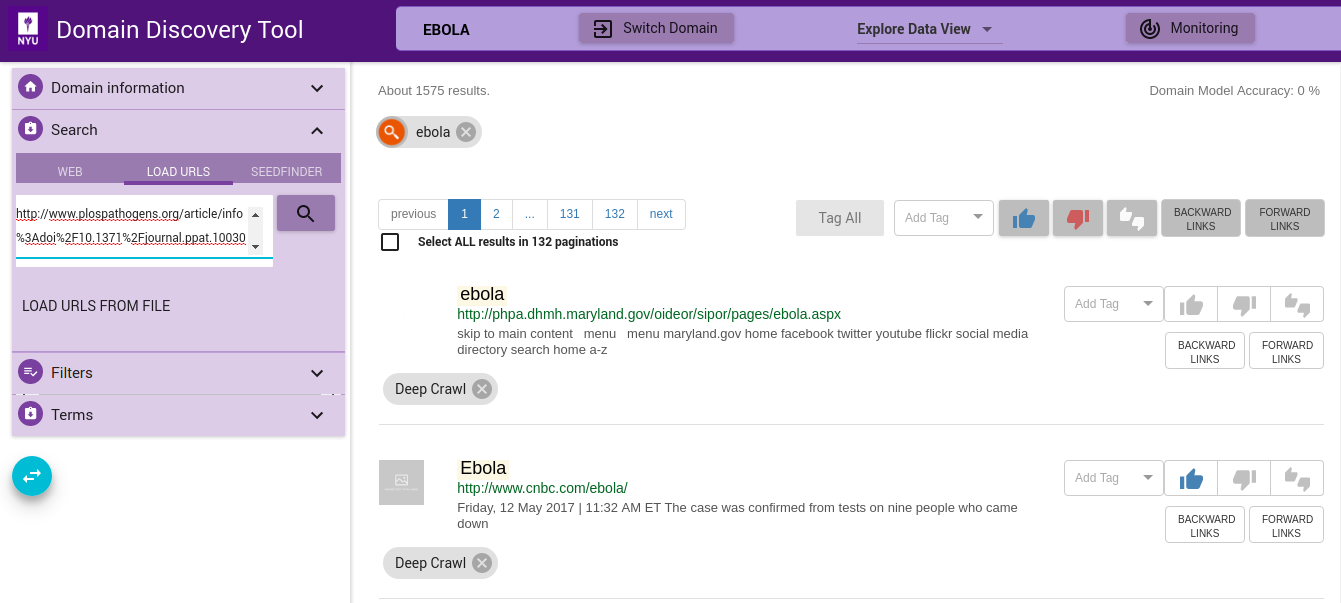
You can also upload a file with the list of URLs by clicking on the LOAD URLS FROM FILE button. This will bring up a file explorer window where you can select the file to upload. The list of fully qualified URLs should be entered one per line in the file. For example:
Download an example URLs list file for ebola domain HERE. Once the file is selected you can upload them by clicking on RELEVANT, IRRELEVANT, NEUTRAL or Add Tag (Add a custom tag). This will annotate the pages correspondingly.
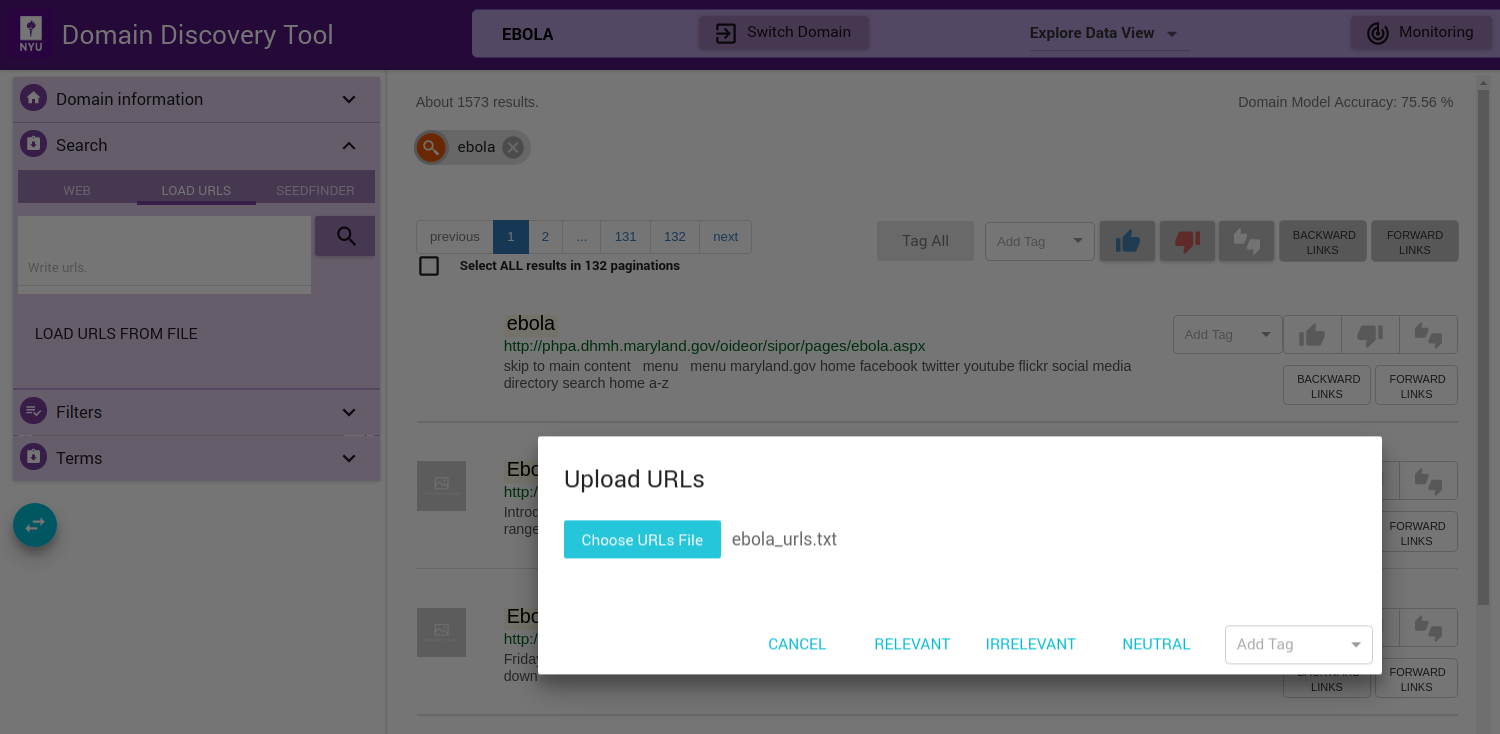
The uploaded URLs are listed in the Filters Tab under Queries as Uploaded.
Web Search
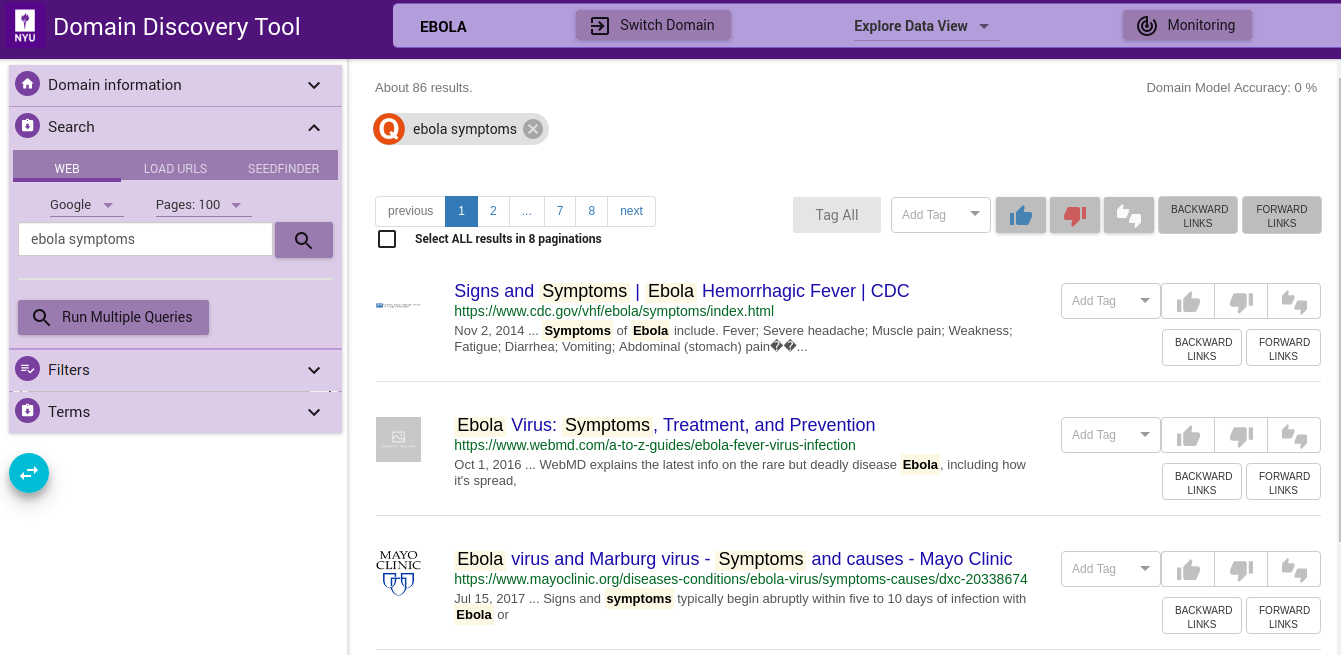
You can do a keywords search on google or bing by clicking on the WEB tab. For example, “ebola symptoms”. All queries made are listed in the Filters Tab under Queries.

If you have a multiple search queries then you can load them by clicking on the Run Multiple Queries button. This will bring up a window where you can either add the queries one per line in a textbox or upload a file that contains the search queries one per line. You can select the search engine to use (Google or Bing):
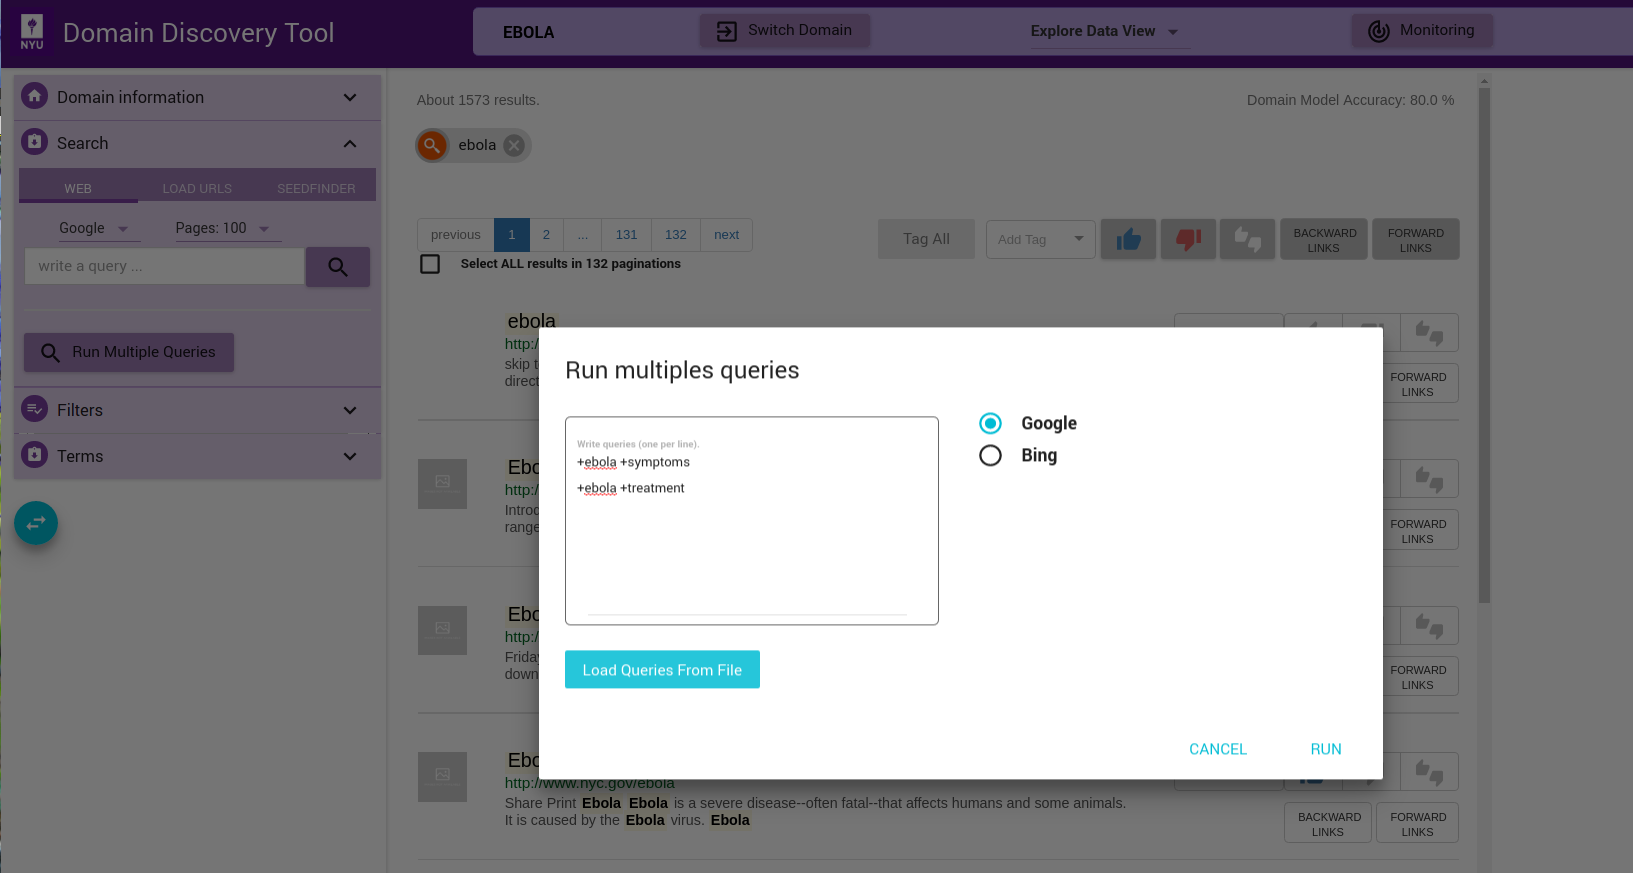
Each of the queries will be issued on Google or Bing (as chosen) and the results made available for exploration and annotation in the Filters Tab under Queries as Uploaded.
SeedFinder
Instead of making multiple queries to Google/Bing yourself you can trigger automated keyword search on Google/Bing and collect more web pages for the domain using the SeedFinder. This requires a domain model. So once you have annoated sufficient pages, indicated by a non-zero accuracy on the top right corner, you can use the SeedFinder functionality.
To start a SeedFinder search click on the SEEDFINDER tab.

Enter the initial search query keywords, for example ebola treatment, as shown in the figure above. The SeedFinder issues this query to Google/Bing. It applies the domain model to the pages returned by Google/Bing. From the pages labeled relevant by the domain model the SeedFinder extracts keywords to form new queries which it again issues to Google/Bing. This iterative process terminates when no more relevant pages are retrieved or the max number of queries configured is exceeded.
You can monitor the status of the SeedFinder in the Process Monitor that can be be accessed by clicking on the ![]() on the top as shown below:
on the top as shown below:
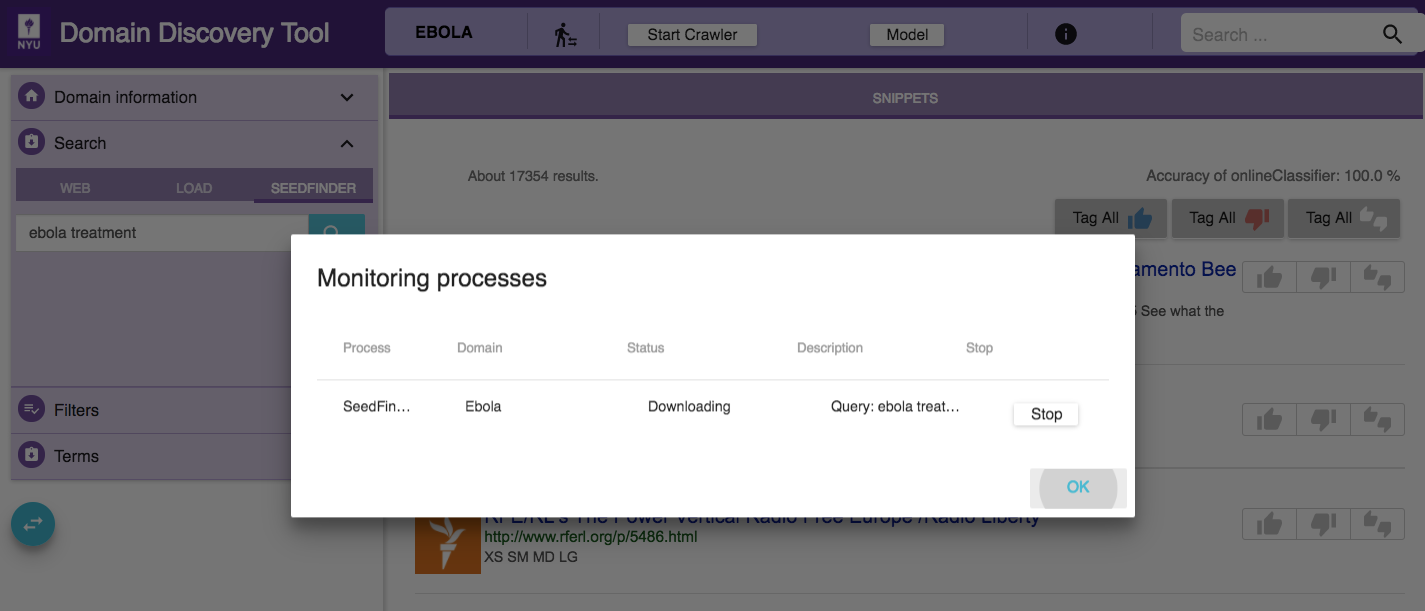
You can also stop the seedfinder process from the Process Monitor by clicking on the stop button shown along the corresponding proces.
All queries made are listed in the Filters Tab under SeedFinder Queries. These pages can now be analysed and annotated just like the other web pages.
Crawl Forward and Backward
This allows the user to crawl one level forward or backward for all the selected URLs.
Forward Links - Forward links are all the links contained in a given page. When you crawl one level forward it downloads all the pages corresponding to the links contained in the page.
Backward Links - Backward links are all the links that contain a link to the given page. When you crawl one level backward it first finds all the links that contain a link to the selected page and then downloads all the pages corresponding to the links contained in the all the backward link pages.
The motivation for backward and forward crawling is the assumption that links containing the selected pages (back links) and links contained in the selected page (forward links) would be about similar topic as the selected page.
Crawl Individual Pages
 buttons, along each page, can be used to crawl backward or forward links in individual pages.
Crawl Selected Pages
Select multiple pages by keeping the ctrl key pressed and clicking on the pages that you want to select. When done with selecting pages, release the ctrl key. This will bring up a window where you can choose to crawl forward or backward the pages as shown below:
Crawl All Pages
Use the  buttons at the top of the list of pages to crawl backward or forward links on all pages in the current view.
Crawl All Pages for Current Filter
If you want to crawl forward or backward all pages retrieved for a particular filter (across pagination), then check the Select ALL results in <total pages> paginations checkbox below the page list on top left. Then use buttons to crawl all the pages.
Explore Data (Filters)
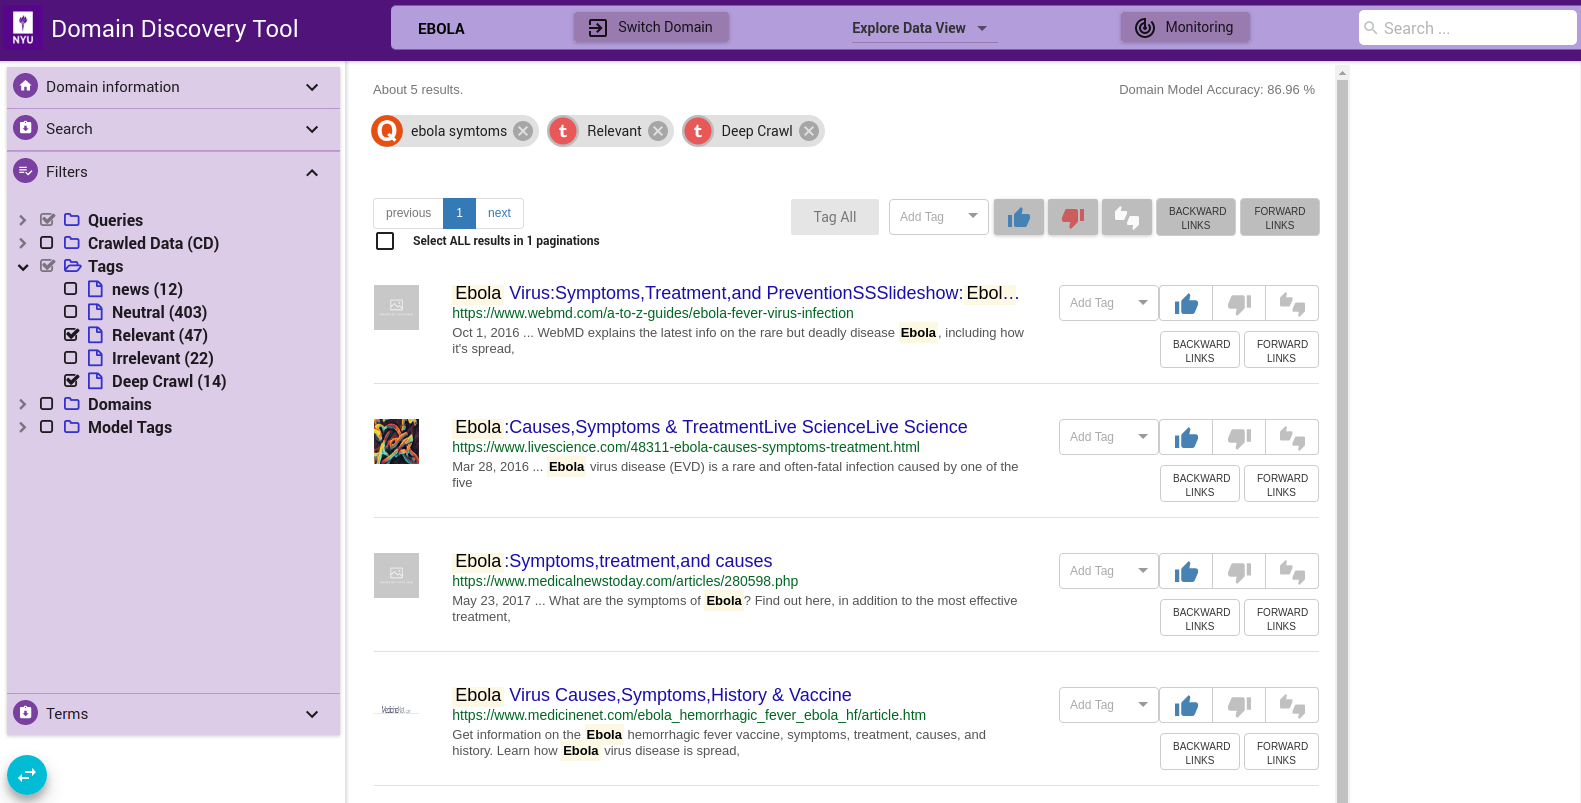
Once some pages are loaded into the domain, they can be analyzed and spliced with various filters available in the Filters tab on the left panel. The available filters are:
Queries
This lists all the web search queries and uploaded URLs made to date in the domain. You can select one or more of these queries to get pages for those specific queries.
Tags
This lists the annotations made to data. Currently the annotations can be either Relevant, Irrelevant or Neutral.
Domains
This lists all the top level domains of all the pages in the domain. For example, the top level domain for URL https://ebolaresponse.un.org/data is ebolaresponse.un.org.
Model Tags
You can expand the Model Tags and click the Upate Model Tags button that appears below, to apply the domain model to a random selection of 500 unlabeled pages. The predicted labels for these 500 pages could be:
Maybe Relevant: These are pages that have been labeled relevant by the model with a high confidence
Maybe Irrelevant: These are pages that have been labeled irrelevant by the model with a high confidence
Unsure: These are pages that were marked relevant or irrelevant by the domain model but with low confidence. Experiments have shown that labeling these pages helps improve the domain model’s ability to predict labels for similar pages with higher confidence.
NOTE: This will take a few seconds to apply the model and show the results.
Annotated Terms
This lists all the terms that are either added, uploaded in the Terms Tab. It also lists the terms from the extracted terms in the Terms Tab that are annotated.
SeedFinder Queries
This lists all the seedfinder queries made to date in the domain. You can select one or more of these queries to get pages for those specific queries.
Crawled Data
This lists the relevant and irrelevant crawled data. The relevant crawled data, CD Relevant, are those crawled pages that are labeled relevant by the domain model. The irrelevant crawled data, CD Irrelevant, are those crawled pages that are labeled irrelevant by the domain model.
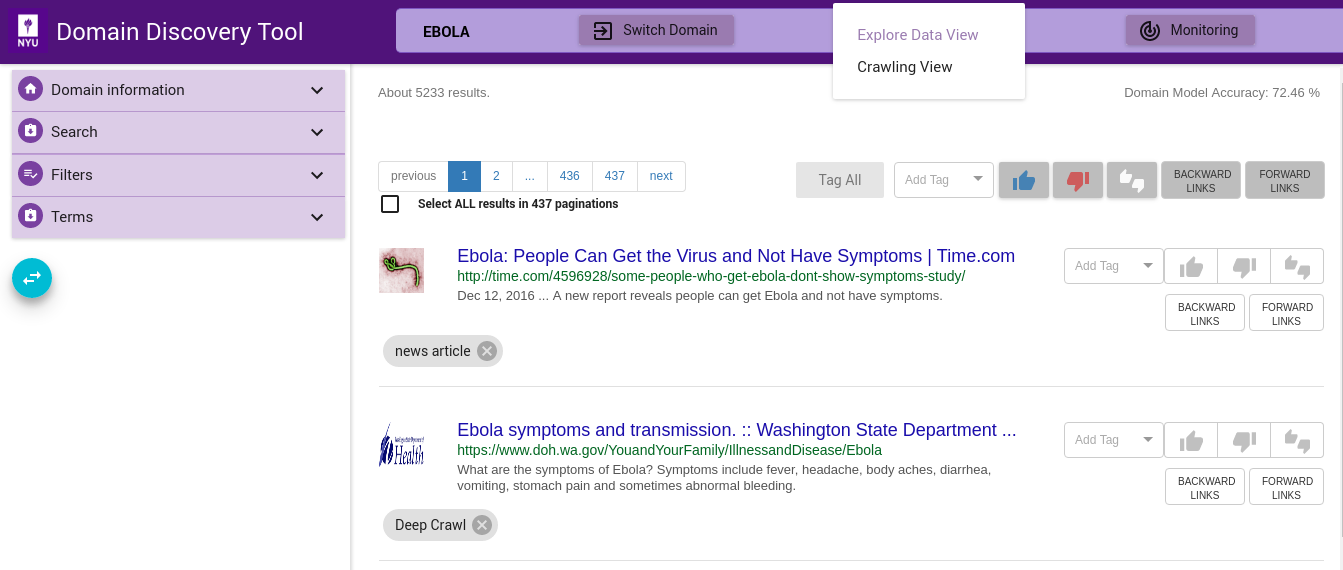
Search for Keywords
Search by keywords within the page content text. This search is available on the top right corner as shown in the figure above. It can be used along with the other filters. The keywords are searched not only in the content of the page but also the title and URL of the page.
Annotate Pages
A model is created by annotating pages as Relevant or Irrelevant for the domain. Currently, the model can only distinguish between relevant and irrelevant pages. You can also annotate pages with custom tags. These can be later grouped as relevant or irrelevant when generating the model. Try to alternate between Steps 3a and 3b to build a model till you reach at least 100 pages for each. This will continuously build a model and you can see the accuracy of the model at the top right corner - Domain Model Accuracy.
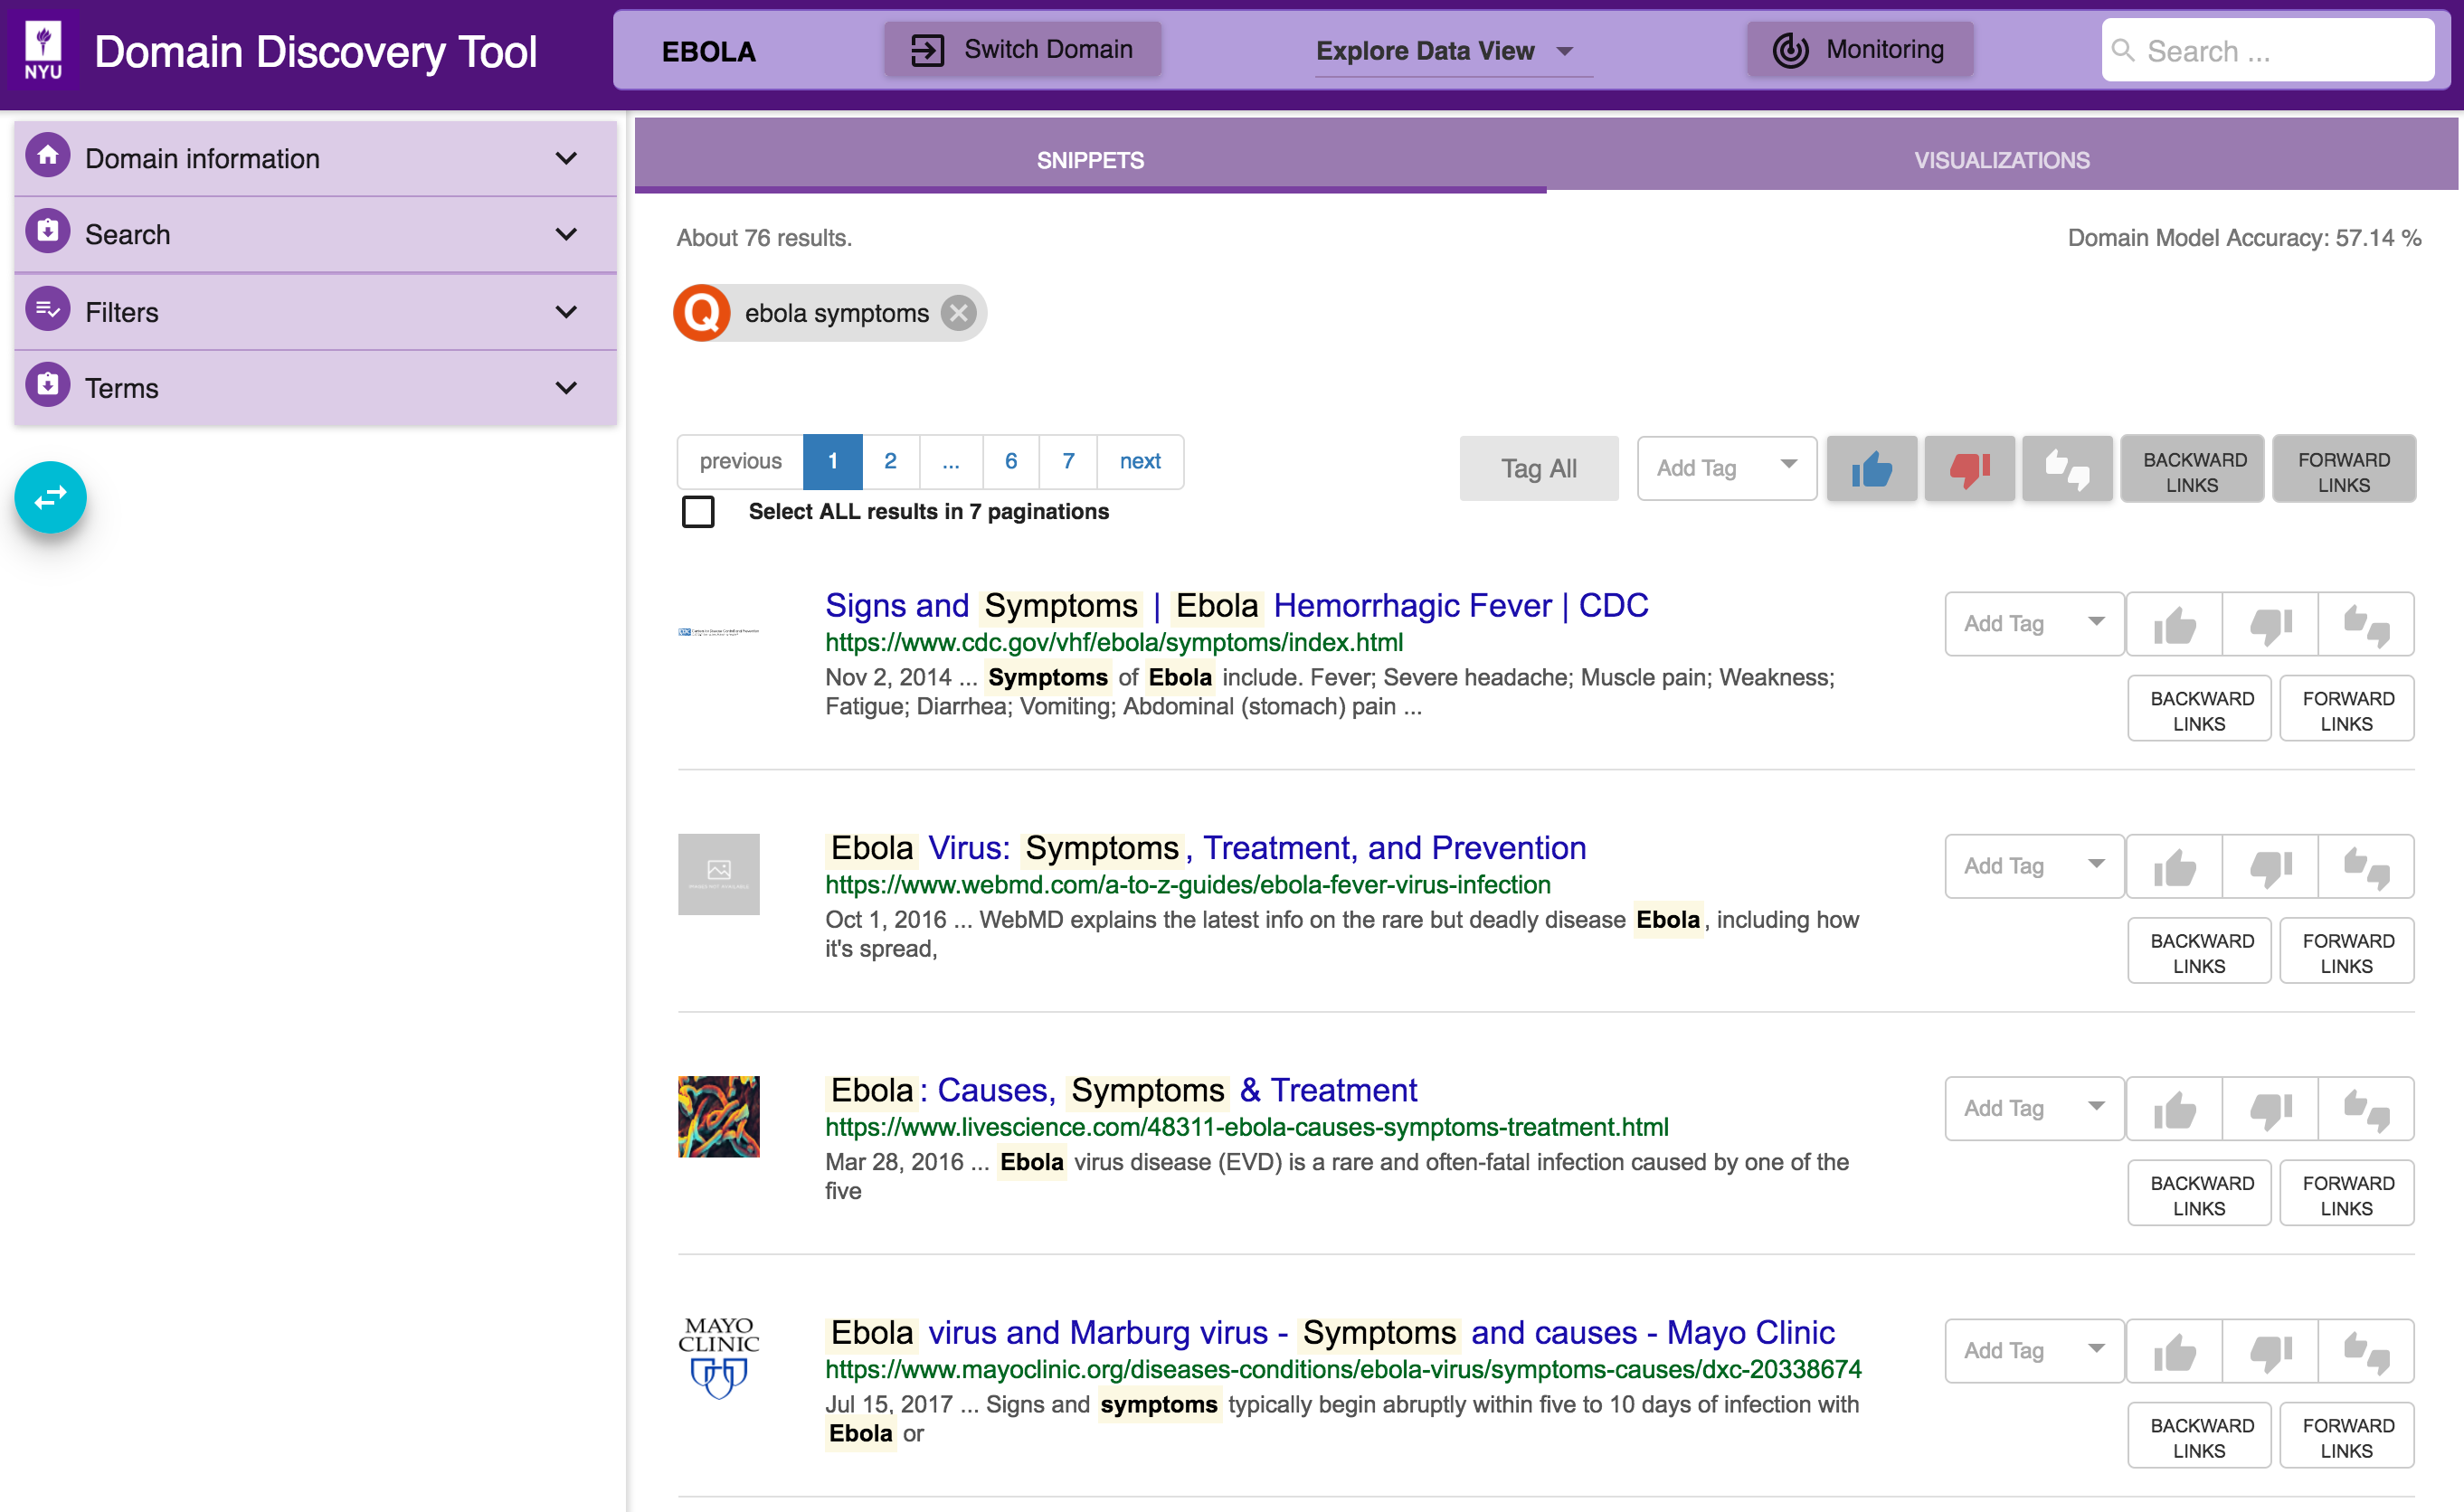
In the Explore Data View you see the pages for the domain (based on any filters applied) in two ways: through Snippets and Visualizations, as shown below:
The different mechanisms for annotating pages through Snippet are:
Tag Individual Pages
buttons, along each page, can be used to tag individual pages.
Tag Selected Pages
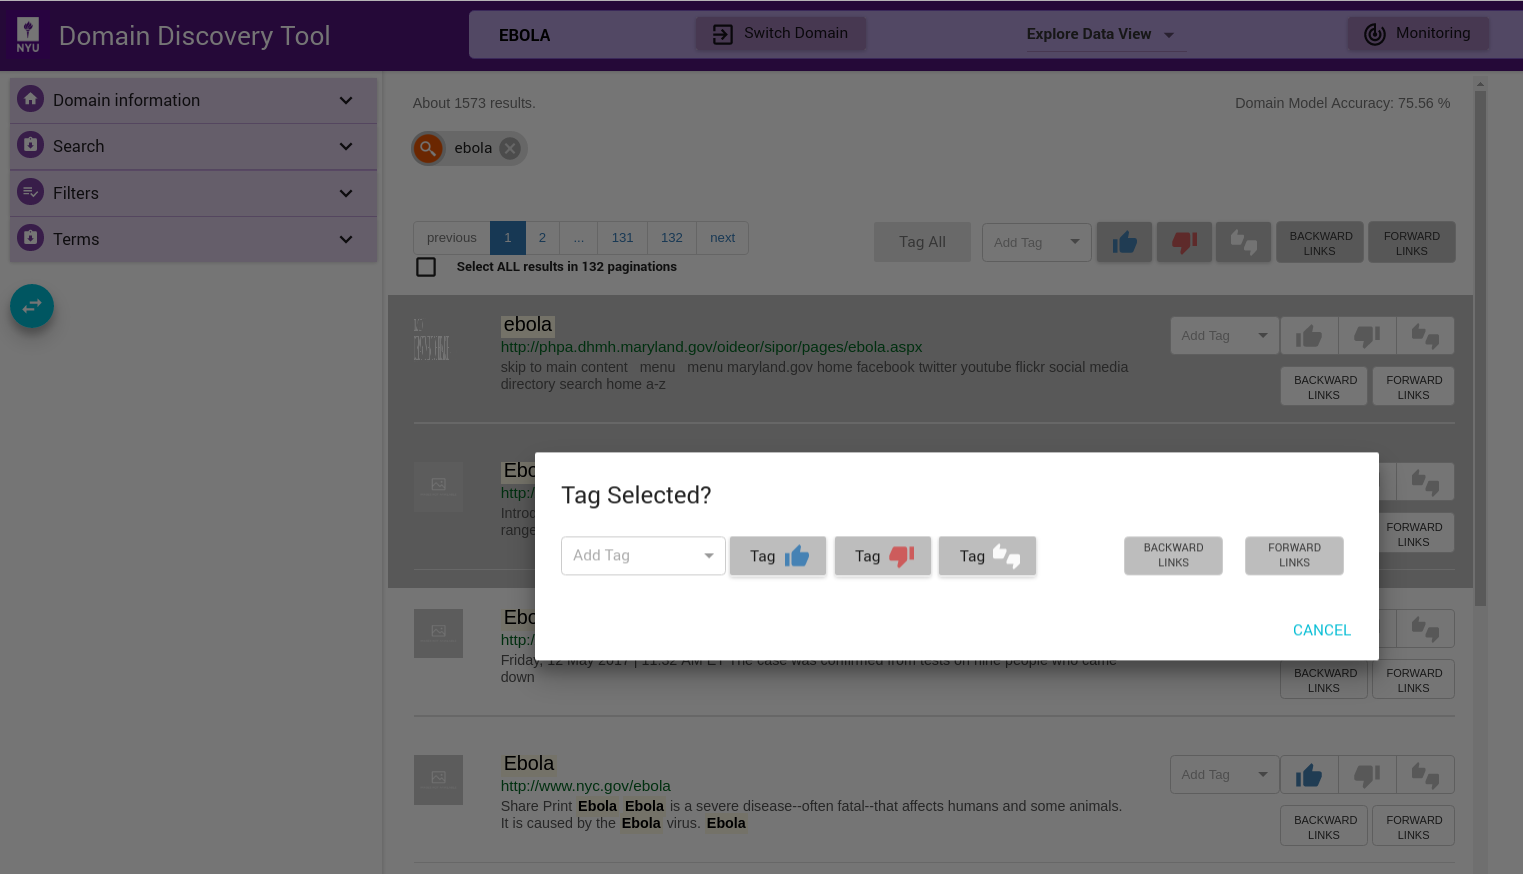
Select multiple pages by keeping the ctrl key pressed and clicking on the pages that you want to select. When done with selecting pages, release the ctrl key. This will bring up a window where you can tag the pages as shown below:
Tag All Pages in View
Use the buttons at the top of the list of pages to tag all pages in the current view
Tag All Pages for Current Filter
If you want to tag all pages retrieved for a particular filter (across pagination), then check the Select ALL results in <total pages> paginations checkbox below the page list on top left. Then use buttons to tag all the pages.
Custom Tag
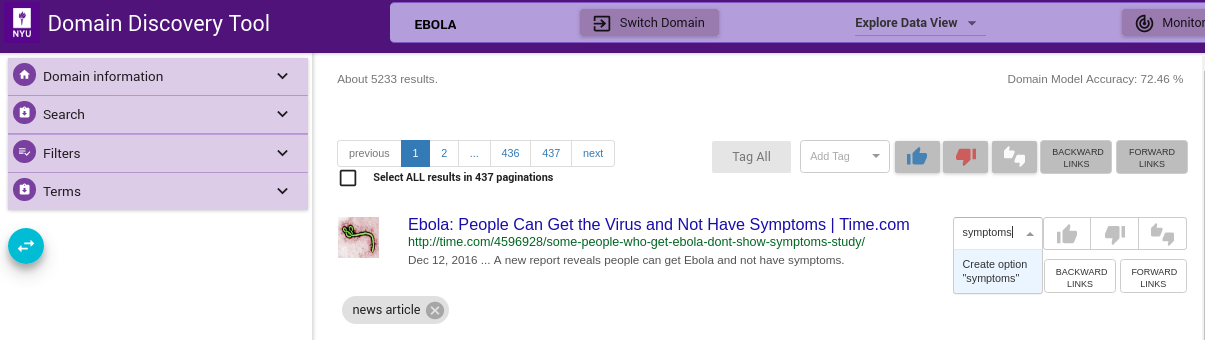
Custom tags can be added using Add Tag text box as shown below. Enter the custom tag in the Add Tag text box and press enter key. This adds the tag as a chip below the page info. This can be applied to individual, selected or all pages similar to relevant and irrelevant tags.
Tag for Deep Crawl
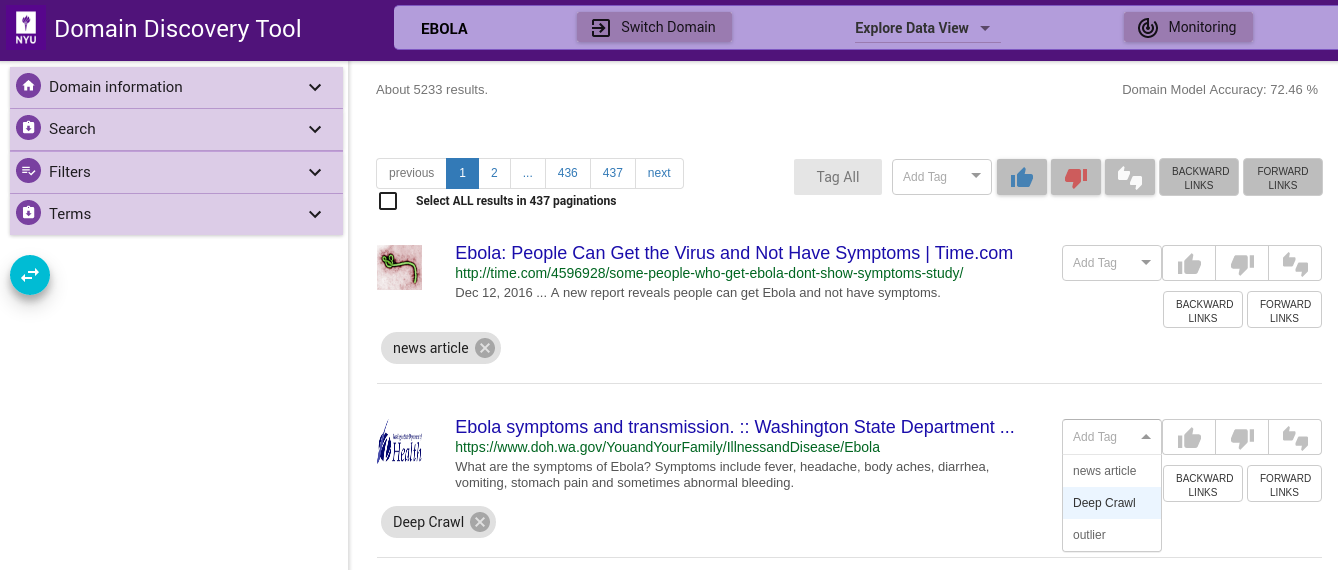
Some tags such as Deep Crawl are pre-configured. User can tag a page (or group of pages) for deep crawl by choosing the tag from the Add Tag drop-down as shown. For example, if user wants to deep crawl all the uploaded pages then they can tag the pages Deep Crawl.
Extracted Terms Summary
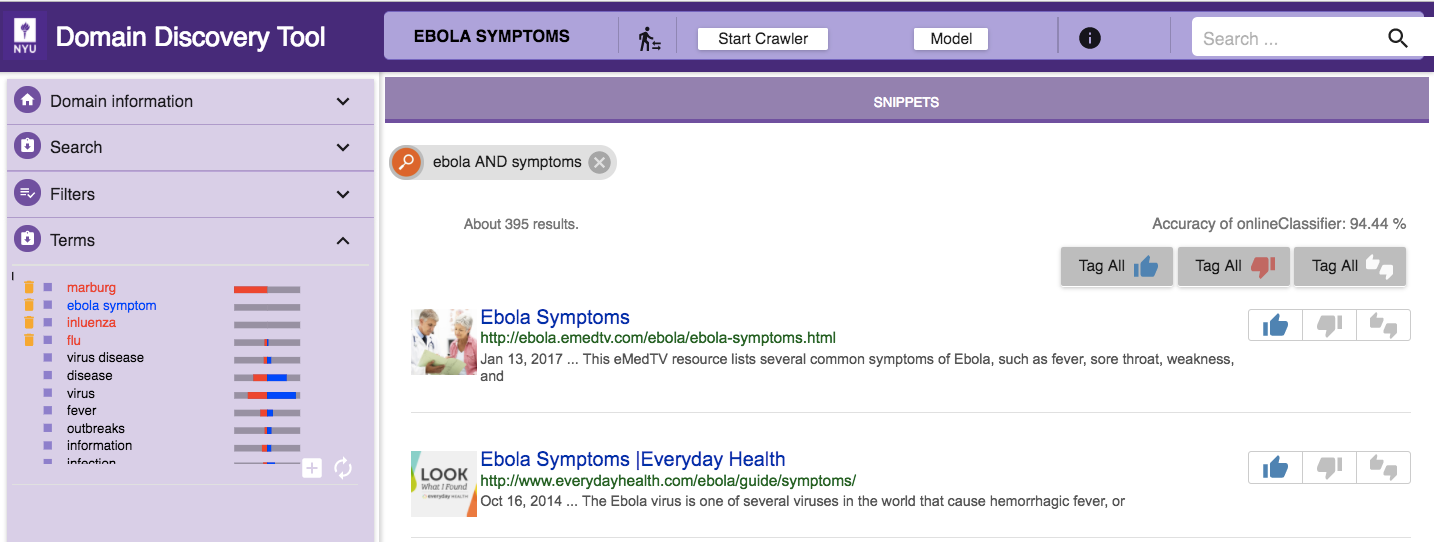
The most relevant terms and phrases (unigrams, bigrams and trigrams) are extracted from the pages in the current view of DDT and listed in the Terms Tab on the left panel, as shown in the figure above. This provides a summary of the pages currently in view. Initially, when there are no annotated terms, the top 40 terms with the highest TFIDF (term frequency-inverse document frequency) are selected. The terms are displayed with their frequency of occurrence in relevant (blue) and irrelevant (red) pages (bars to the right of the Terms panel). This helps the expert to select terms that are more discerning of relevant pages.
Terms can be tagged as ’Positive’ and ’Negative’ by 1-click and 2-click respectively. The tags are stored in the active data source. When the update terms button is clicked, the positively and negatively annotated terms are used to re-rank the other terms. Terms help the expert understand and discover new information about the domains of interest. The terms can be used to refine the Web search or start new sub topic searches.
Custom relevant and irrelevant terms can be added by clicking the + button to boost the extraction of more relevant terms. These custom terms are distinguised by the delete icon before them which can be clicked to delete the custom term.
Hovering the mouse over the terms in the Terms window displays the context in which they appear on the pages. This again helps the expert understand and disambiguate the relevant terms. Inspect the terms extracted in the “Terms” window. Clicking on the stop button pins the context to the corresponding term.
Visualization through RadViz
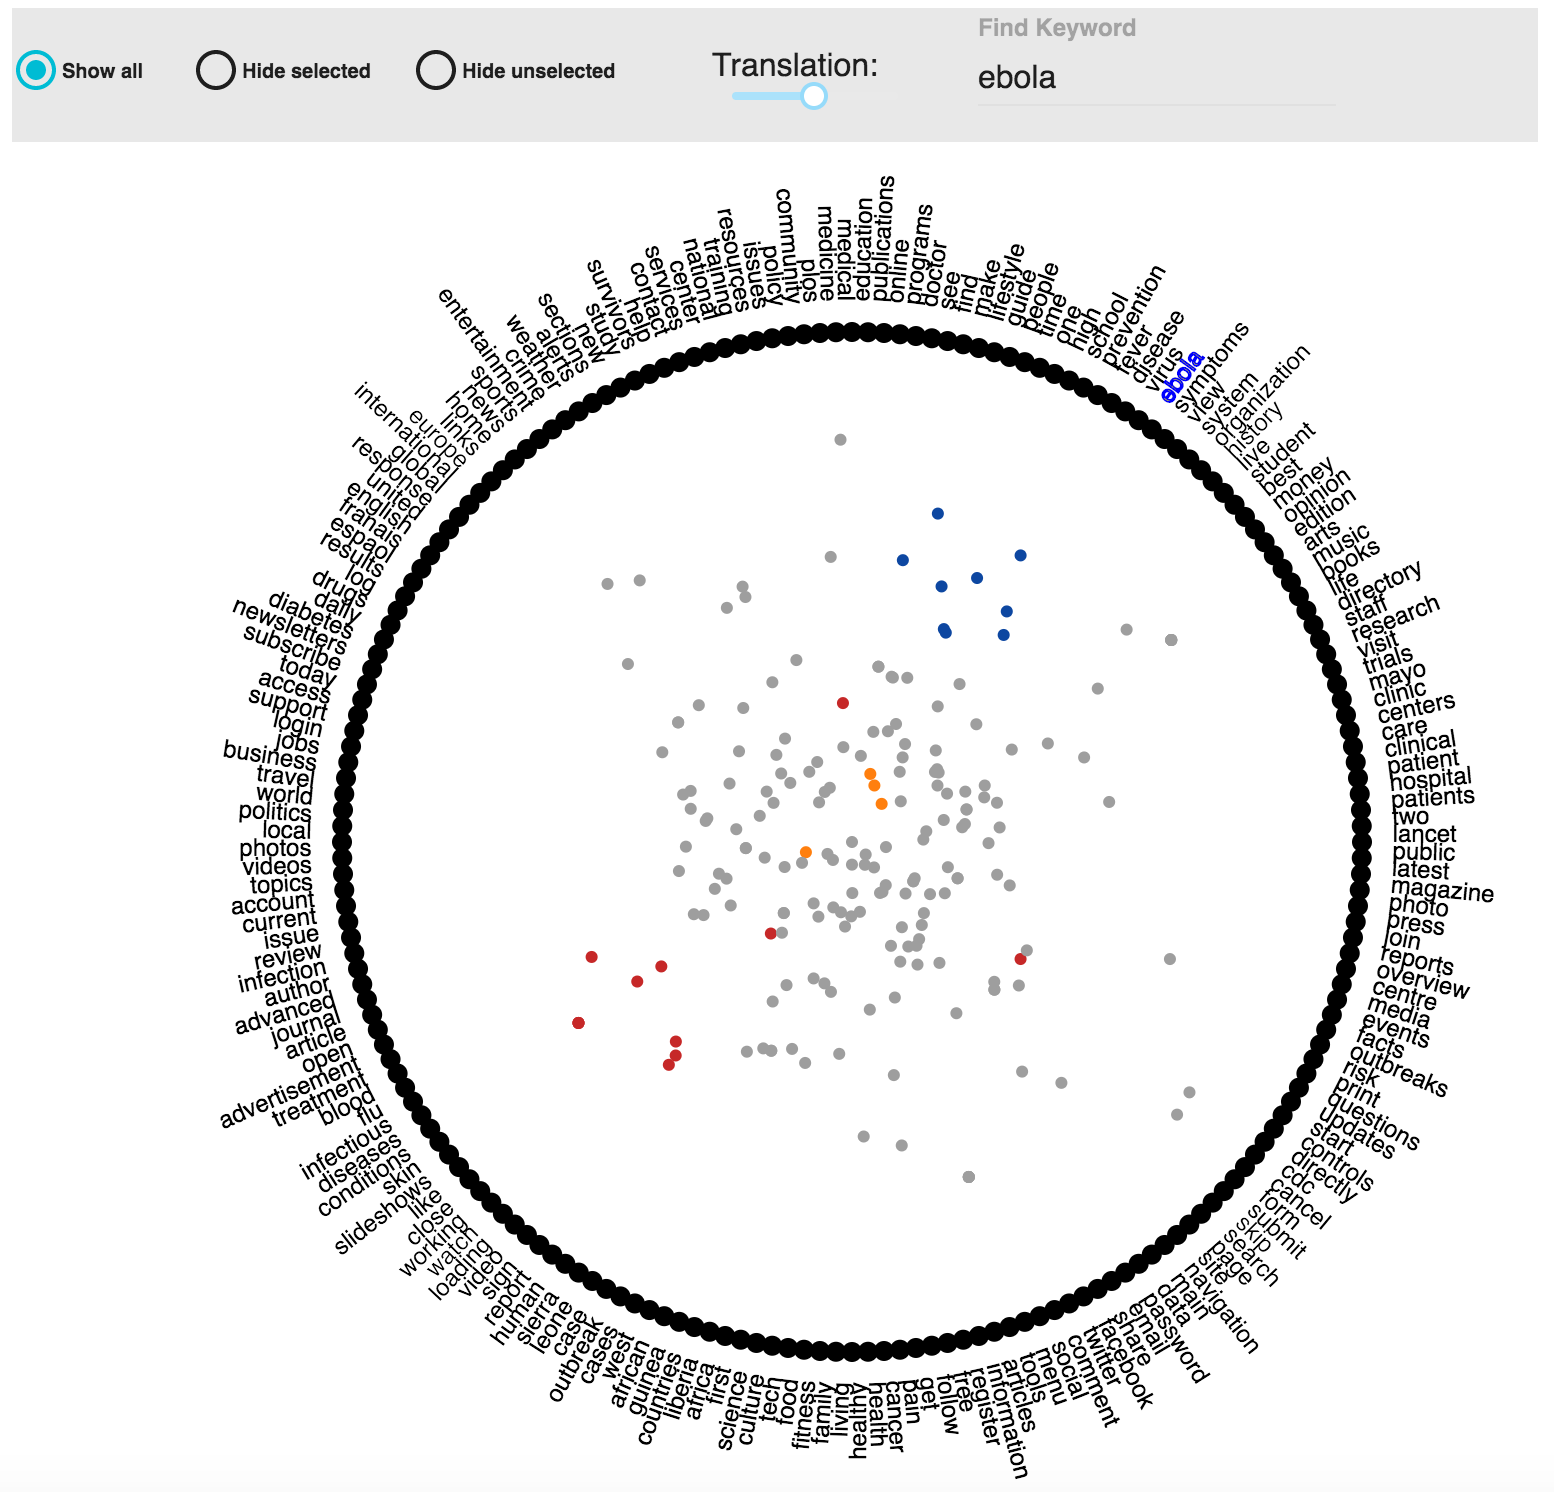
Select the Visualization Tab in the Explore Data View to see the multidimensional scaling visualization using RadViz.

RadViz is a data visualization that enables users to explore and analyze samples in a data set (such as a corpus of web pages in the case of DDT), represented as points in the visualization, in terms of similarity relations among semantic descriptors (keywords on the pages). Keywords are located along a circle, and pages are represented as a points in the circle. The more similar the pages the closer the distance between them. Also, the greater the proximity of a page to a keyword, the greater the frequency of occurrence of that keyword in that page. This kind of analysis allows users to identify regions of interest in the data set according to the most relevant features of the sample.
Explore Pages
In order to explore the pages in the visualization you would need to select the pages that you want to see the various details for.

Selection of a group of pages is done using lasso selection. For this, the user simply drags a freehand selection around the pages located in the circle in RadViz, similar to how you would outline something on a piece of paper with a pen or pencil. To start the lasso selection users simply have to click at the spot where you want to begin the selection, then continue holding your mouse button down and drag to draw a freeform selection outline. To complete the selection, simply release your mouse button. You don’t necessarily have to return the same spot you started from, but if you don’t, RadViz will automatically close the selection for you by drawing a straight line from the point where you released your mouse button to the point where you began, so in most cases, you will want to finish where you started.
When the pages are selected, you will observe the following:
- Keywords contained in the selected pages will be highlighted along the circle.
- A WordCloud of all the top keywords contained in the selected pages is generated in the right top corner. The font size of the keyword in the word cloud is proportional to the frequency of occurence of the word
- Snippets of selected pages are shown at the right bottom corner
Pages can be tagged through RadViz as ’Positive’ and ’Negative’, and even Custom Tag, by drawing lasso around any region of interest, which made the selection of a sub-group of pages very easy, and then users can tag the selected pages as ’Positive’, ’Negative’ and Custom Tag.
ToolBar RadViz

This visualization has five controls to interact with, whose functionlity are described below.
Showing data in RadViz
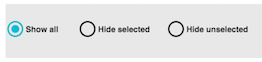 radio buttons, can be used to show or hide data on RadViz.
Show all: Show all is selected by default in this visualization. It shows all the pages present in the data collection.
Hide selected: This option hides the selected pages of the current view.
Hide unselected: This option hides the pages that are not selected.
Translation in RadViz
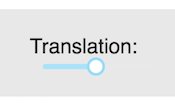 slider allows to calibrate the degree of denseness or sparseness of the representations of the pages in the visualization.
Find Keyword in RadViz
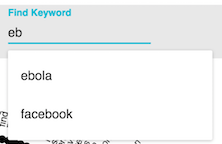 auto-complete text-field allows to search a keyword over all keywords in the visualization. Blue font color is used to highlight the keyword (shown below). This functionality is supported by an autocomplete process using all keyword used in th current view of RadViz.
Run Crawler
Once a sufficiently good model is available or pages are tagged for a deep crawl you can change from Explore Data View to the Crawler View to start the crawlsshown below:
Deep Crawl
In order to run a Deep Crawl annotate pages to be crawled with tag Deep Crawl as described in Tag for Deep Crawl.
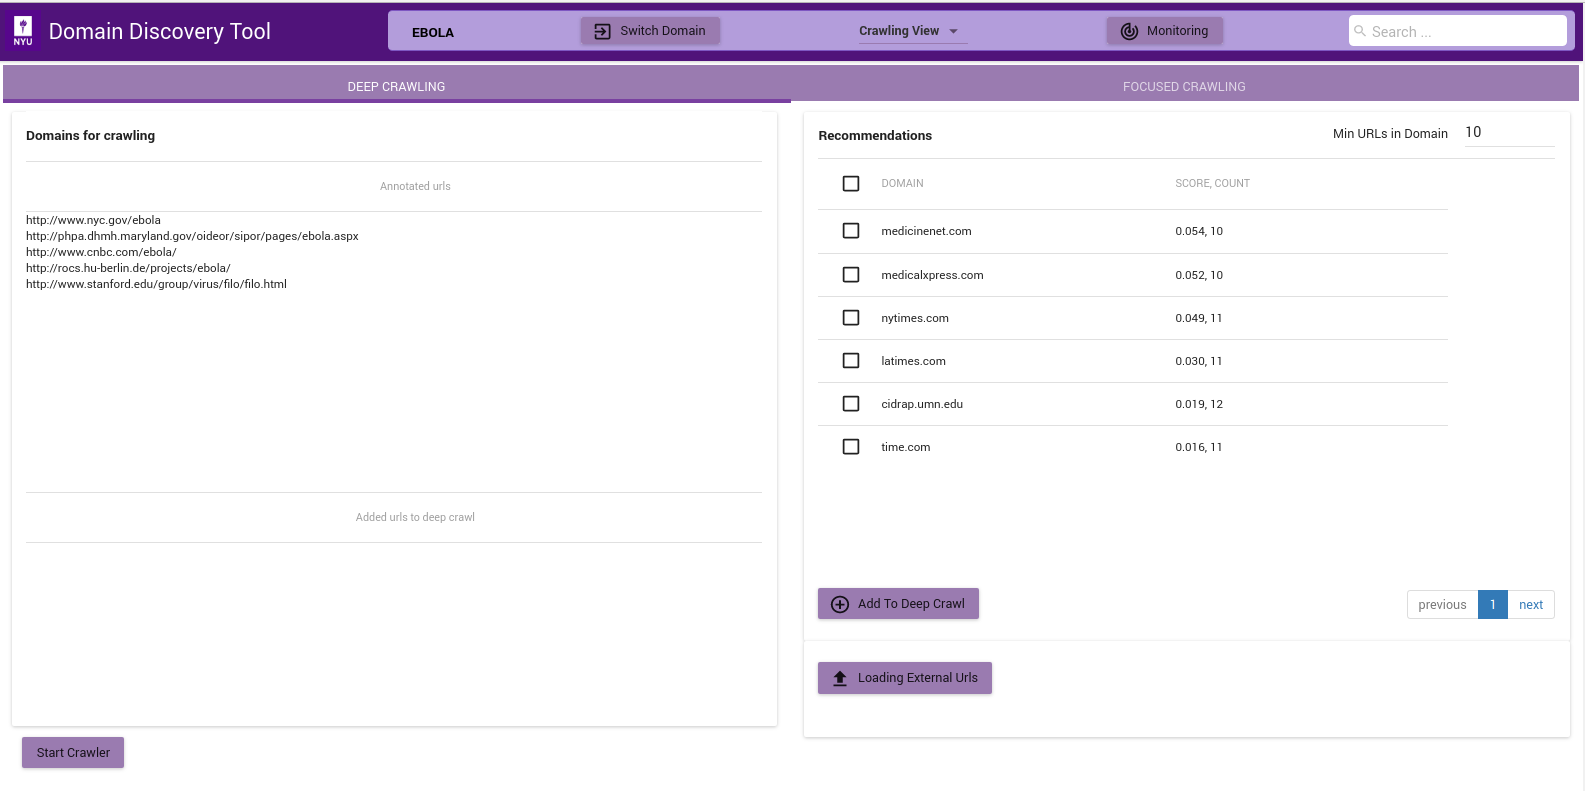
The figure above shows the Deep Crawl View. The list on the left shows all pages annotated as Deep Crawl in the Explore Data View. The table on the right shows recommendations of pages that could be added to deep crawl by clicking on the Add to Deep Crawl. If keyword terms are added or annotated then recommendations are made based on the score of how many of the keywords they contain. Otherwise the domains are recommended by the number of pages they contain.
The deep crawler can be started by clicking on Start Crawler button at the bottom. This starts a deep crawler with all the pages tagged for Deep Crawl.
You can see the results of the crawled data in Crawled Data in the Filters Tab. When the crawler is running it can be monitored by clicking on the Crawler Monitor button.
Focused Crawl
The figure below shows the Focused Crawler View:
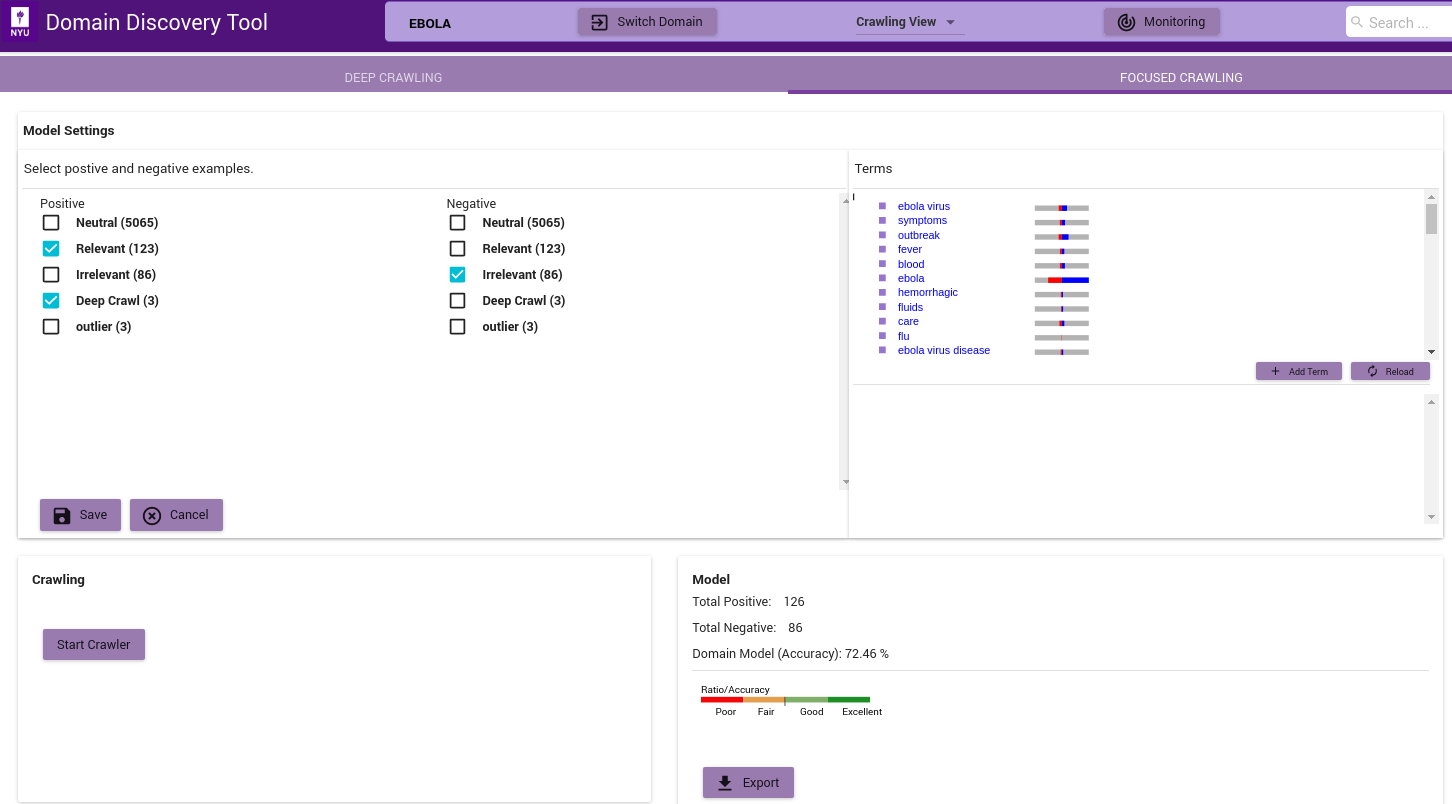
- In the ‘Model Settings’ on the left select the tags that should be considered as relevant(Positive) and irrelevant(Negative). If there sufficient relevant and irrelevant pages (about 100 each), then you can start the crawler by clicking on the Start Crawler button.
- If there are no irrelevant pages then a page classifier model cannot be built. Instead you can either upload keywords by clicking on the ‘Add Terms’ in the Terms window. You can also annotate the terms extracted from the positive pages by clicking on them. If no annotated terms are available then the top 50 terms are used to build a regular expression model.
- Once either a page classifier or a regex model is possible start the focused crawler by clicking on the Start Crawler.
You can see the results of the crawled data in “Crawled Data” in the Filters Tab. When the crawler is running it can be monitored by clicking on the ‘Crawler Monitor’ button.
The Model info on the bottom right shows how good a domain model is if there are both relevant and irrelevant pages annotated. The color bar shows the strength of the model based on the balance of relevant and irrelevant pages and the classifier accuracy of the model.