Getting Started
Building Domain Index
Creating a domain specific index involves:
- Uploading known relevant URL domains from which you would like to collect all URLs belonging to that domain. This is called a deep crawl. Follow steps 1,2 and 4, below, for this.
- Create a domain model that can be used for a focused crawl (broad crawl). For this follow all the steps 1-4 below.
Step 1
Create Domain

Begin by adding a domain on the Domains page (initial page), shown in the figure above, by clicking on the Add Domain button. Domain maintains context of domain discovery.
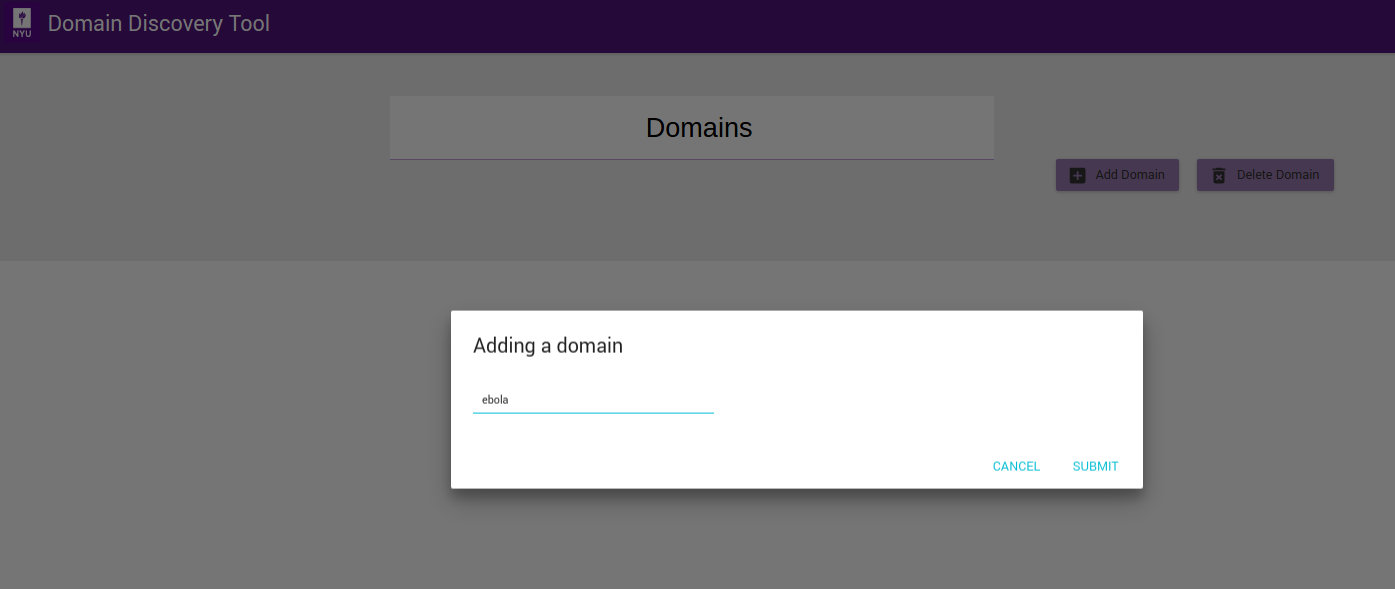
On the Adding a domain dialog shown in figure above, enter the name of the domain you would like to create, for example Ebola, and click on Submit button. You should now see the new domain you added in the list of domains as shown below.

Once domain is added click on domain name in the list of domains to collect, analyse and annotate web pages.
Step 2
Acquire Data
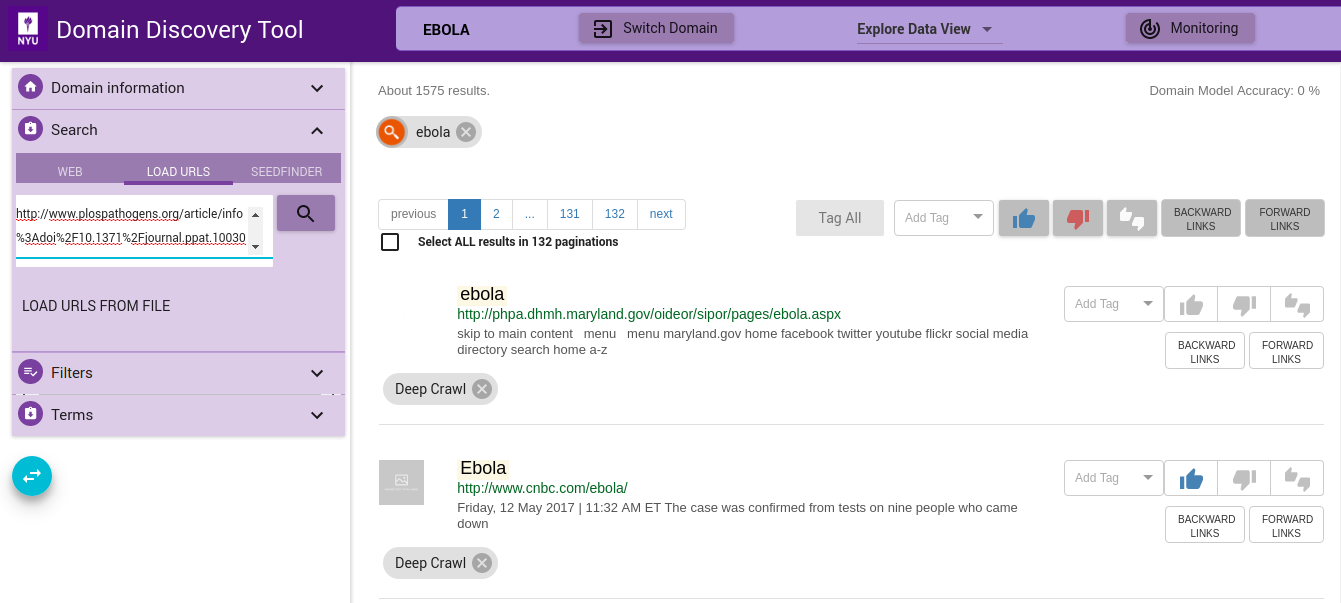
Continuing with our example of the Ebola domain, we show here the methods of uploading data. Expand the Search tab on the left panel. You can add data to the domain in the following ways:
Upload URLs
If you have a set of URLs of sites you already know, you can add them from the LOAD tab. You can upload the list of URLs in the text box, one fully qualified URL per line, as shown in figure below:
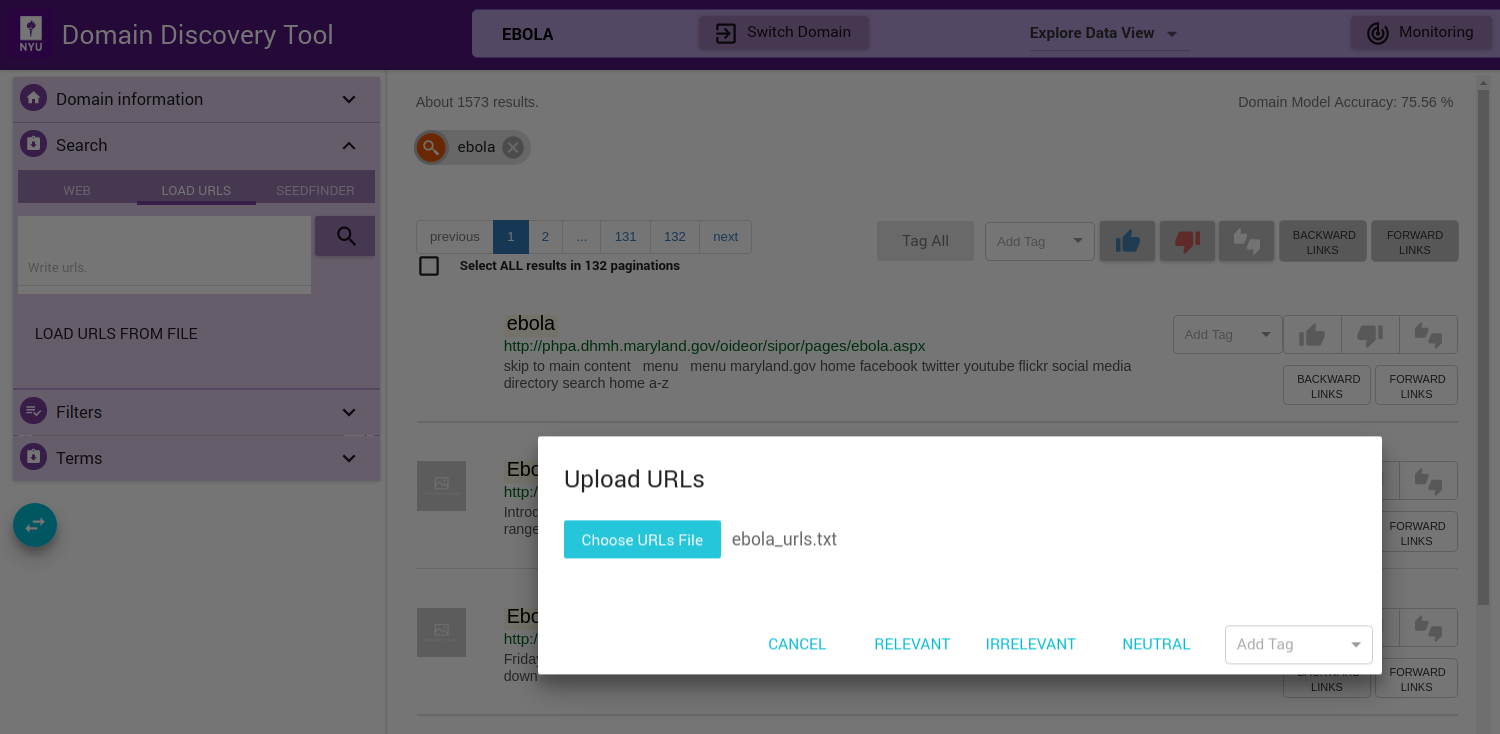
You can also upload a file with the list of URLs by clicking on the LOAD URLS FROM FILE button. This will bring up a file explorer window where you can select the file to upload. The list of fully qualified URLs should be entered one per line in the file. For example:
Download an example URLs list file for ebola domain HERE. Once the file is selected you can upload them by clicking on RELEVANT, IRRELEVANT, NEUTRAL or Add Tag (Add a custom tag). This will annotate the pages correspondingly.
The uploaded URLs are listed in the Filters Tab under Queries as Uploaded.
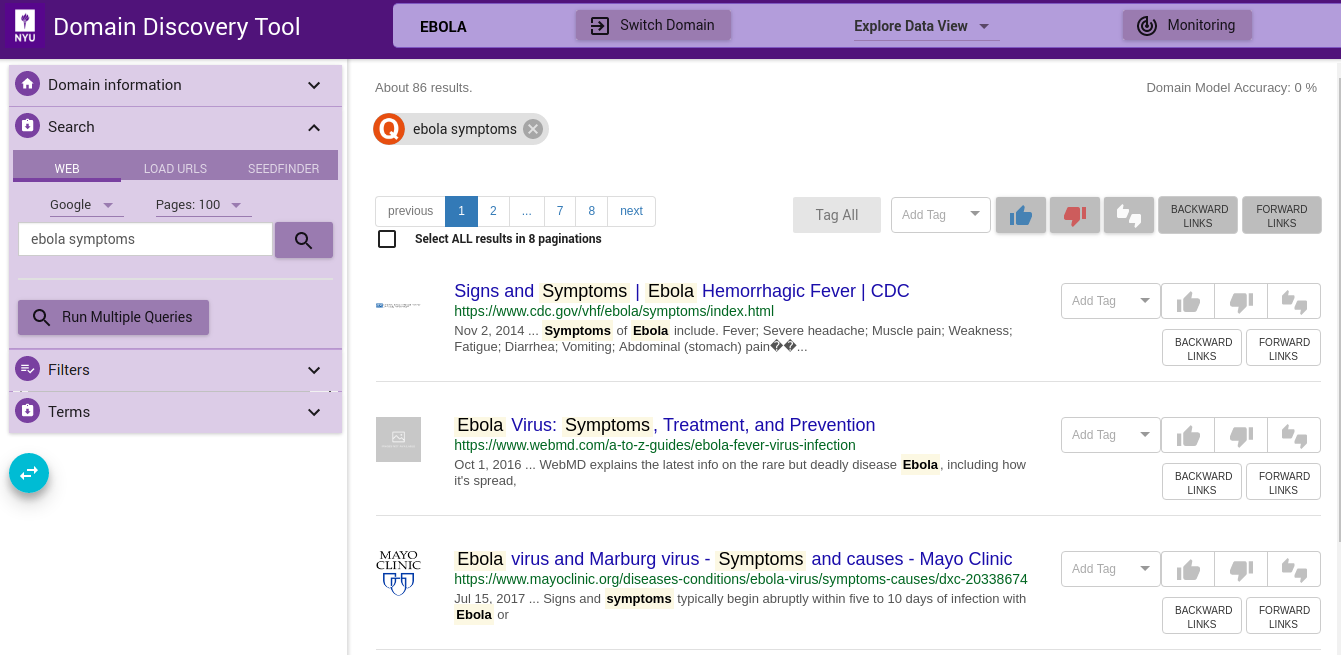
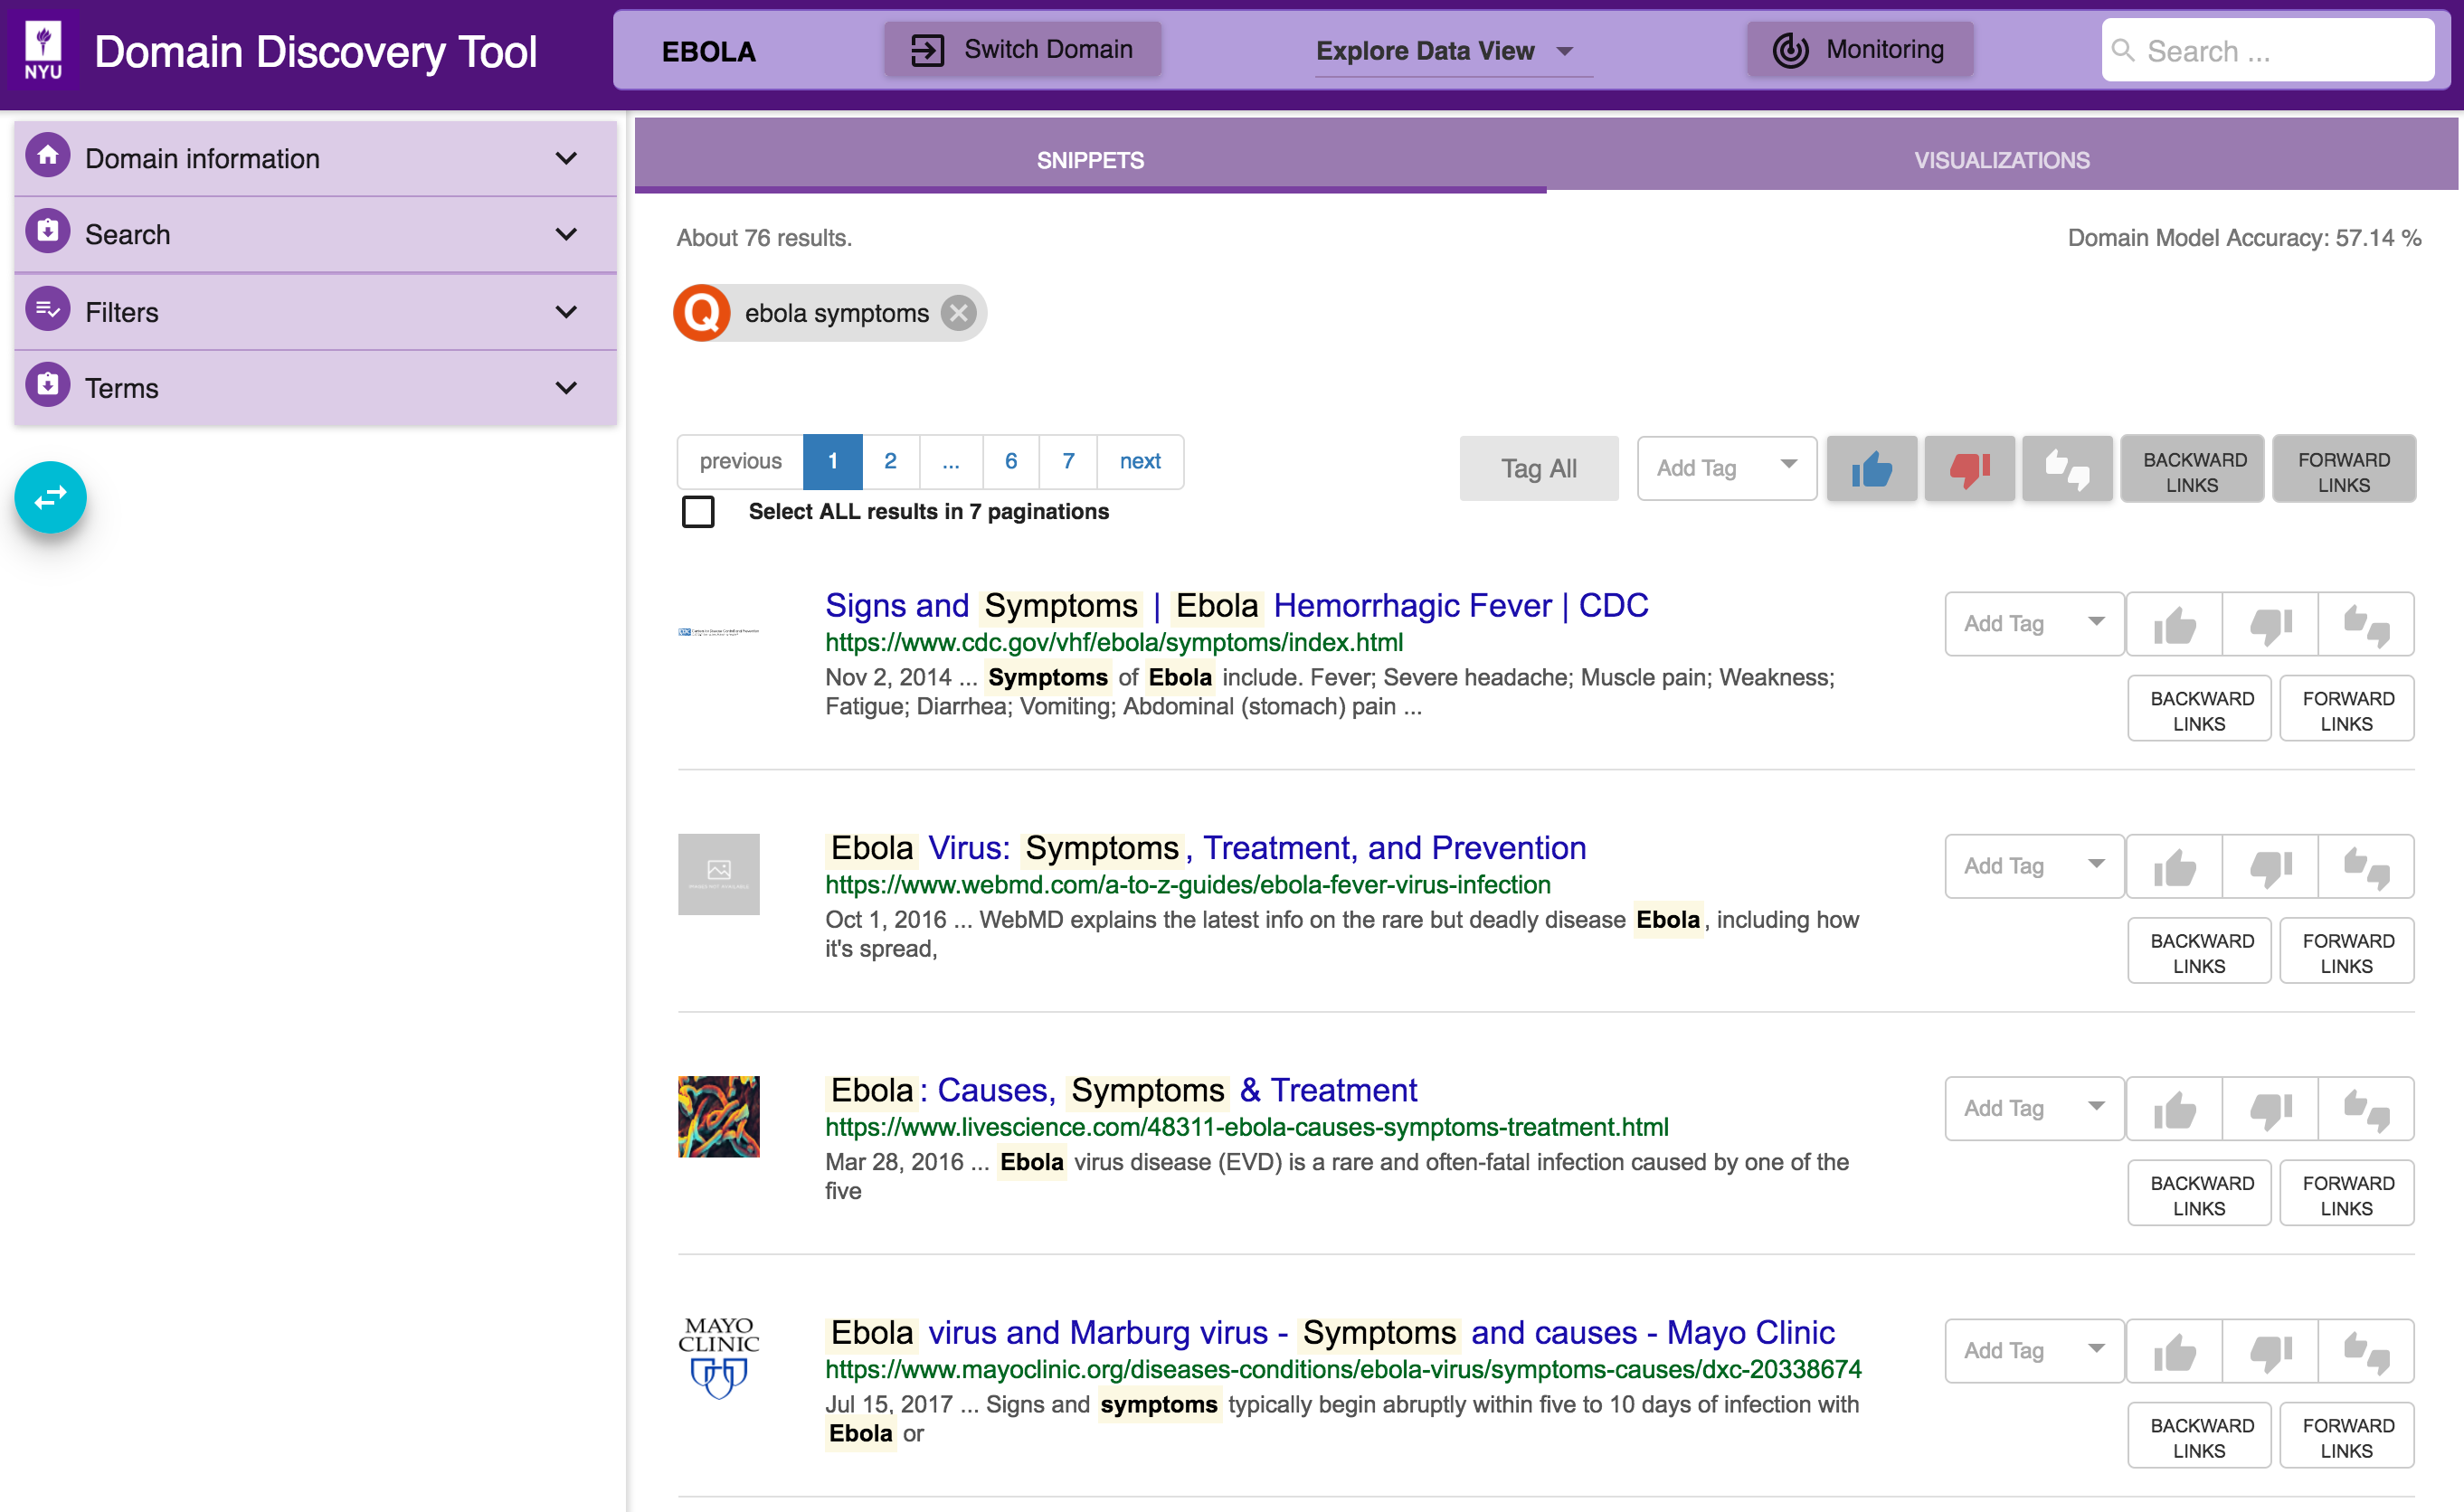
Web Search
You can do a keywords search on google or bing by clicking on the WEB tab. For example, “ebola symptoms”. All queries made are listed in the Filters Tab under Queries.
If you have a multiple search queries then you can load them by clicking on the Run Multiple Queries button. This will bring up a window where you can either add the queries one per line in a textbox or upload a file that contains the search queries one per line. You can select the search engine to use (Google or Bing):
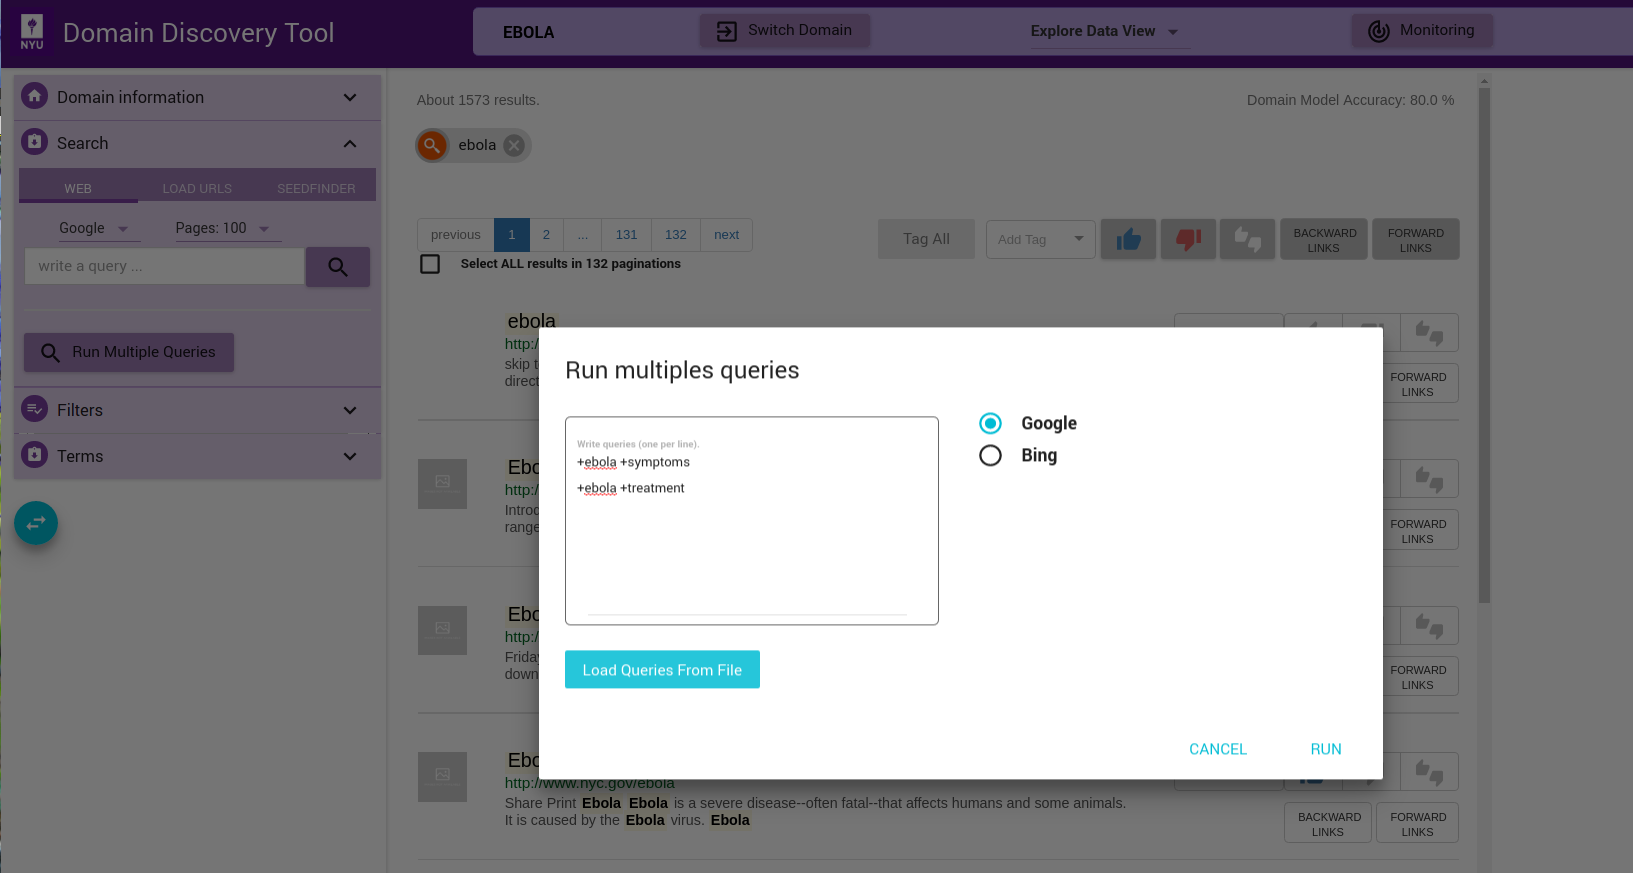
Each of the queries will be issued on Google or Bing (as chosen) and the results made available for exploration and annotation in the Filters Tab under Queries as Uploaded.
Step 3
Annotate Pages
A model is created by annotating pages as Relevant or Irrelevant for the domain. Currently, the model can only distinguish between relevant and irrelevant pages. You can also annotate pages with custom tags. These can be later grouped as relevant or irrelevant when generating the model. Try to alternate between Steps 3a and 3b to build a model till you reach at least 100 pages for each. This will continuously build a model and you can see the accuracy of the model at the top right corner - Domain Model Accuracy.
Step 3a
Tag at least 100 Relevant pages for your domain. Refer How to Annotate.
Step 3b
Tag at least 100 Irrelevant pages for your domain. Refer How to Annotate.
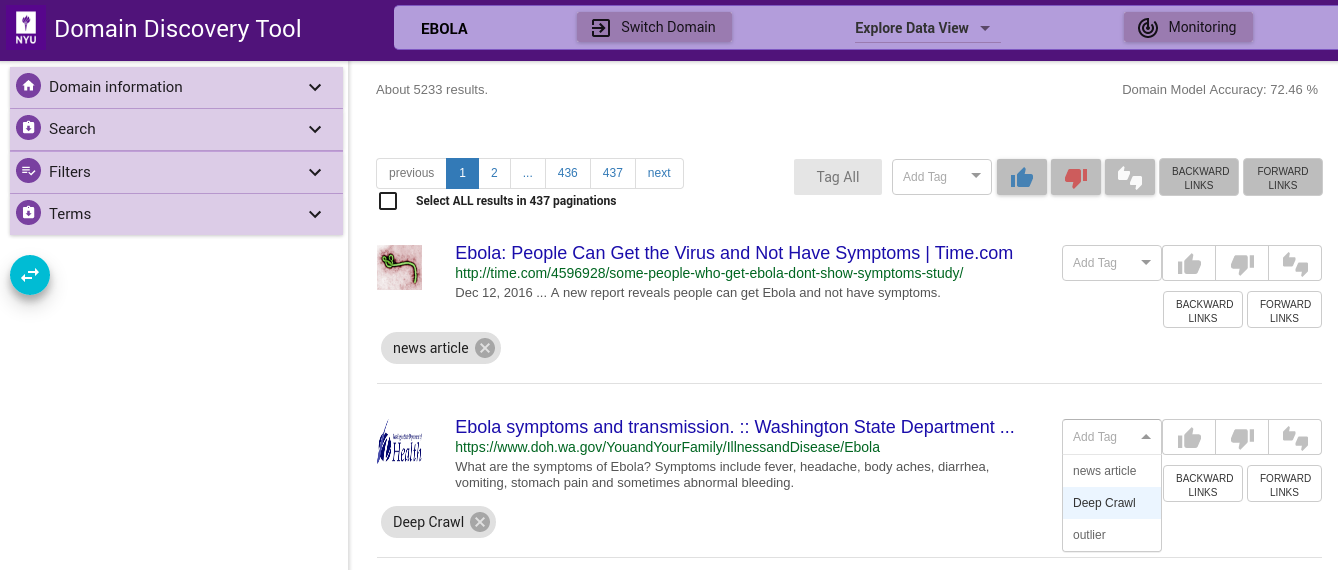
How to Annotate
In the Explore Data View you see the pages for the domain (based on any filters applied) in two ways: through Snippets and Visualizations, as shown below:
The different mechanisms for annotating pages through Snippet are:
Tag Individual Pages
 buttons, along each page, can be used to tag individual pages.
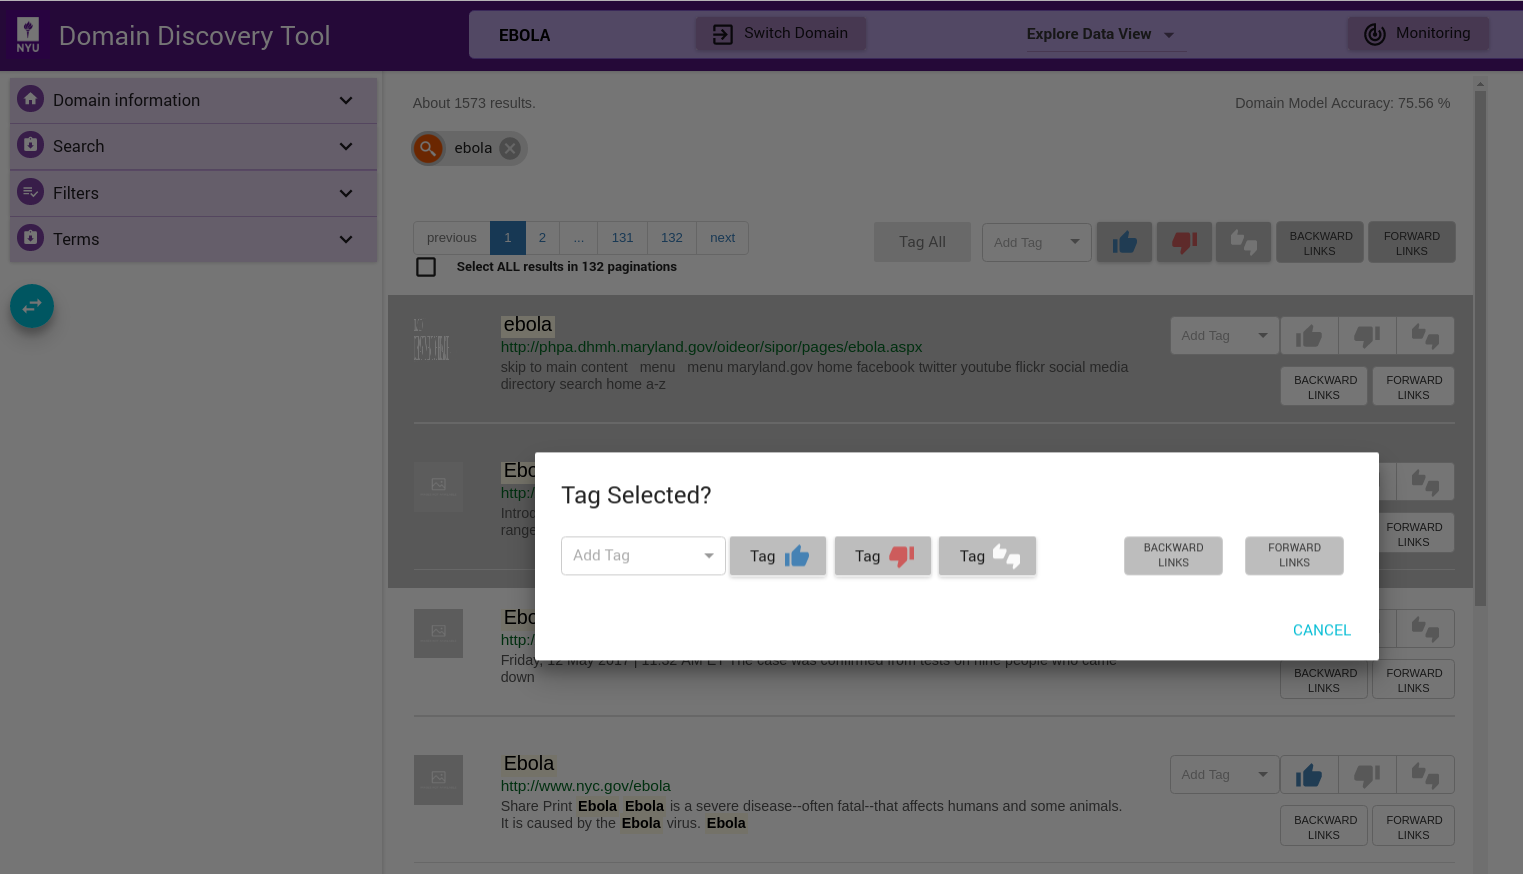
Tag Selected Pages
Select multiple pages by keeping the ctrl key pressed and clicking on the pages that you want to select. When done with selecting pages, release the ctrl key. This will bring up a window where you can tag the pages as shown below:
Tag All Pages in View
Use the  buttons at the top of the list of pages to tag all pages in the current view
Tag All Pages for Current Filter
If you want to tag all pages retrieved for a particular filter (across pagination), then check the Select ALL results in <total pages> paginations checkbox below the page list on top left. Then use buttons to tag all the pages.
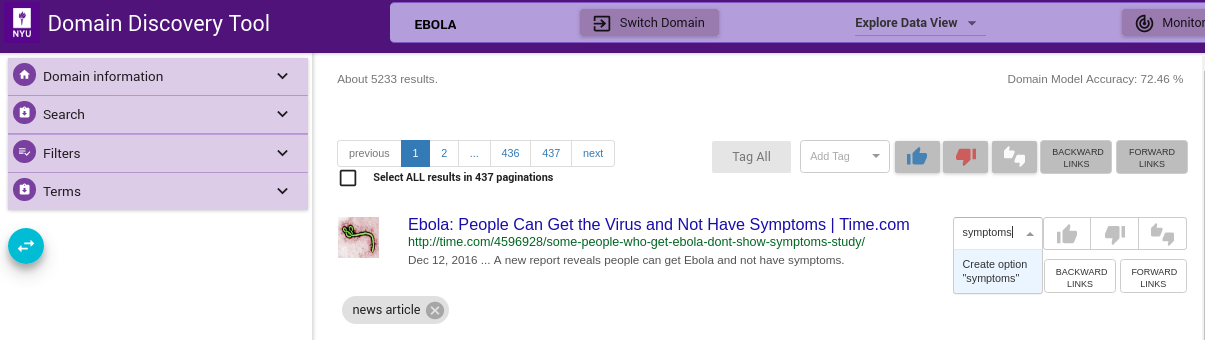
Custom Tag
Custom tags can be added using Add Tag text box as shown below. Enter the custom tag in the Add Tag text box and press enter key. This adds the tag as a chip below the page info. This can be applied to individual, selected or all pages similar to relevant and irrelevant tags.
Tag for Deep Crawl
Some tags such as Deep Crawl are pre-configured. User can tag a page (or group of pages) for deep crawl by choosing the tag from the Add Tag drop-down as shown. For example, if user wants to deep crawl all the uploaded pages then they can tag the pages Deep Crawl.
Step 4
Run Crawler
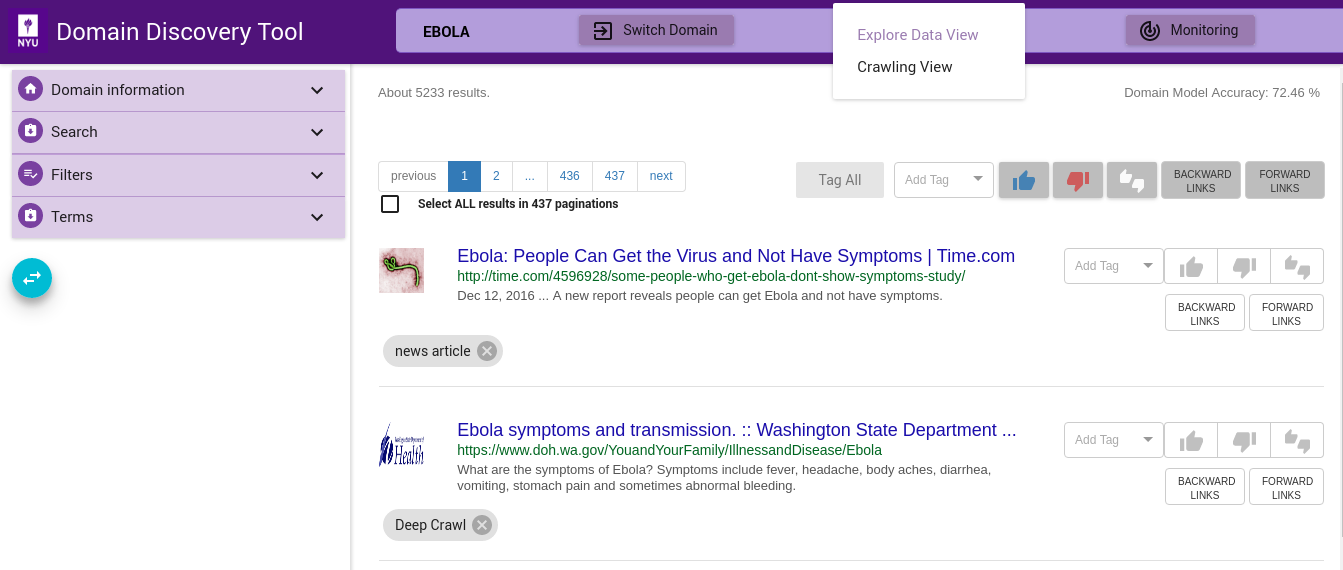
Once a sufficiently good model is available or pages are tagged for a deep crawl you can change from Explore Data View to the Crawler View to start the crawlsshown below:
Step 4a
Deep Crawl
In order to run a Deep Crawl annotate pages to be crawled with tag Deep Crawl as described in Tag for Deep Crawl.
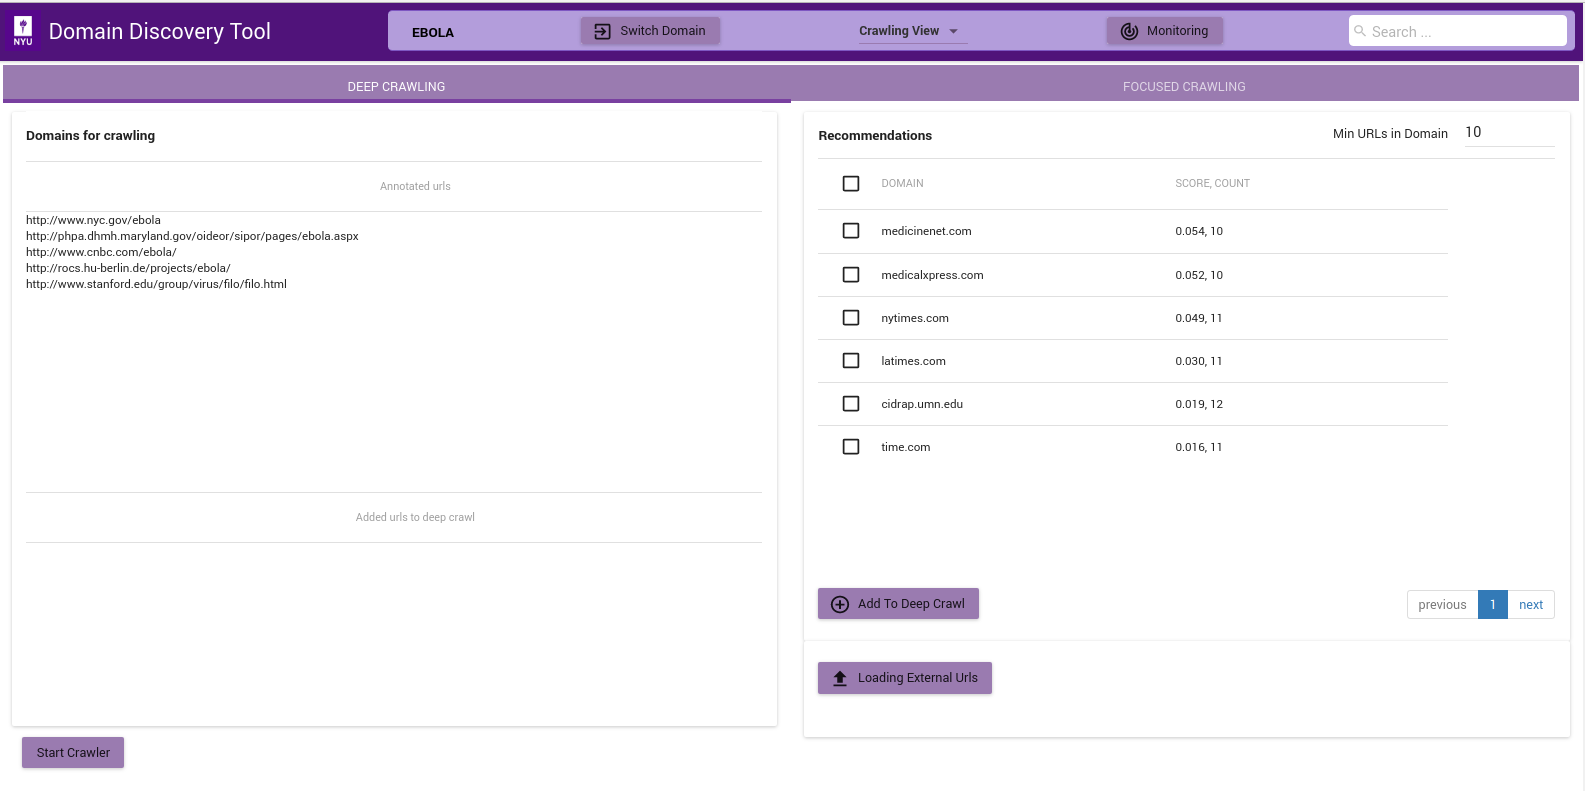
The figure above shows the Deep Crawl View. The list on the left shows all pages annotated as Deep Crawl in the Explore Data View. The table on the right shows recommendations of pages that could be added to deep crawl by clicking on the Add to Deep Crawl. If keyword terms are added or annotated then recommendations are made based on the score of how many of the keywords they contain. Otherwise the domains are recommended by the number of pages they contain.
The deep crawler can be started by clicking on Start Crawler button at the bottom. This starts a deep crawler with all the pages tagged for Deep Crawl.
You can see the results of the crawled data in Crawled Data in the Filters Tab. When the crawler is running it can be monitored by clicking on the Crawler Monitor button.
Step 4b
Focused Crawl
The figure below shows the Focused Crawler View:
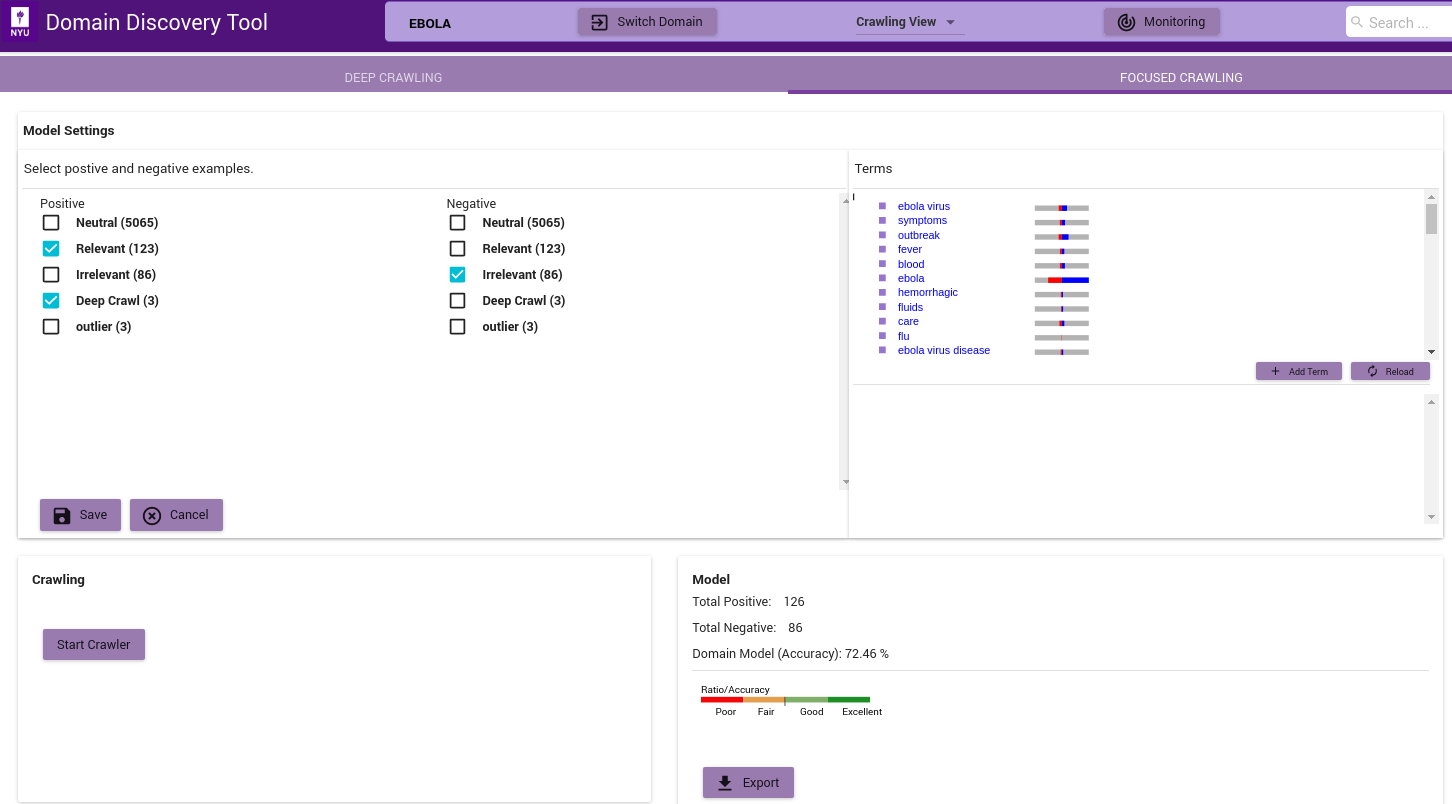
- In the ‘Model Settings’ on the left select the tags that should be considered as relevant(Positive) and irrelevant(Negative). If there sufficient relevant and irrelevant pages (about 100 each), then you can start the crawler by clicking on the Start Crawler button.
- If there are no irrelevant pages then a page classifier model cannot be built. Instead you can either upload keywords by clicking on the ‘Add Terms’ in the Terms window. You can also annotate the terms extracted from the positive pages by clicking on them. If no annotated terms are available then the top 50 terms are used to build a regular expression model.
- Once either a page classifier or a regex model is possible start the focused crawler by clicking on the Start Crawler.
You can see the results of the crawled data in “Crawled Data” in the Filters Tab. When the crawler is running it can be monitored by clicking on the ‘Crawler Monitor’ button.
The Model info on the bottom right shows how good a domain model is if there are both relevant and irrelevant pages annotated. The color bar shows the strength of the model based on the balance of relevant and irrelevant pages and the classifier accuracy of the model.